Sunday, February 27, 2011

Rennovation Additions


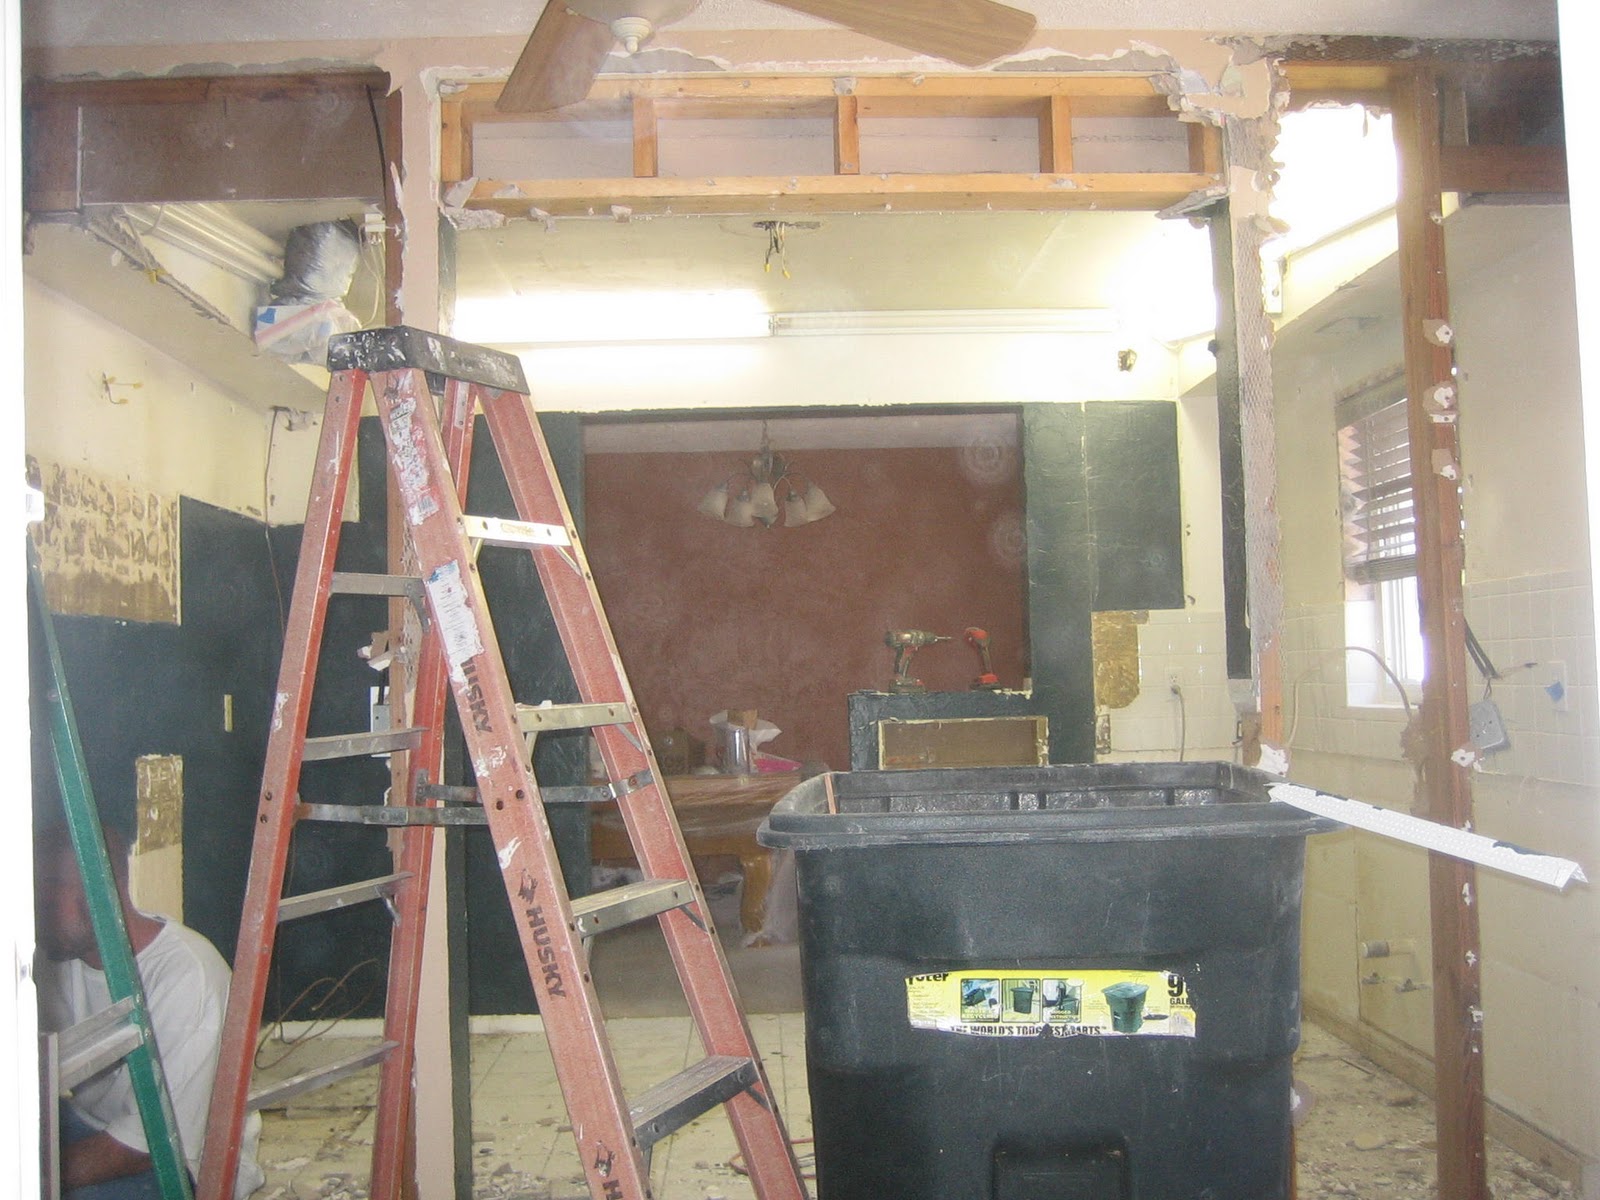
As any homeowner will know, no project is easy, or done without creating another project. In the process of demolition of the kitchen seen here, our next step was to patch the walls that we took out. It was decided then that an additional step would be to add a skim coat of plaster throughout the kitchen and dining room, as well as the ceiling, to help remove the 4 different textures on the walls that were running throughout the house and give it a more cohesive, finished feel. While this was not originally in our budget, it only makes sense to do it now, while there is a ton of drywall dust still settling and nothing in the rooms to move around or cover.


And since painting the new walls was the next step anyway, a good skim coat just preps the walls for a better paint finish. The kitchen and dining room feel so much more open and fresh! And let me tell you how nice it is NOT to have popcorn on the ceiling!

Also, while the crews were putting the final touches on the walls, we had an electrician come in to remove some of the old ceiling fans, move electrical and add can lighting in the kitchen, and add the new fixtures in the bathroom.The areas in which electrical was moved or removed were also patched.

The next addition that we were anticipating was pouring the concrete floor. In the living room, there was a 9'x8'x3" section that was lower than the rest of the floor. It may have been part of an old carport or garage at one time that was closed in, but it really chopped up the big living room as far as functionality goes. And since adding wood flooring is our next step, it would have cost us more to fit flooring and trim pieces in this section than it would to fill it in with concrete for one solid floor. Plus, it really lengthens the room and gives us more options for furniture arrangement. Here you can see the new floor.

We will have the flooring company out this week to measure and order the flooring, and since the material takes a few weeks to come in, it will give the concrete a time to set and dry. You never want to put flooring down over damp concrete, especially wood, because it will cause buckling or warping.

So while the progress has taken a few steps back as far as our original timeline goes, the additions that we have done will make the finished product so much nicer in the end. And skim coating the walls and pouring a concrete floor add more value than they cost in the long run.

And while the kitchen was being demolished and the walls were getting a nice coat of plaster, my brother and I were priming and painting the shed, aka Man Cave, where the pool table will eventually live. This is actually a finished shed that is quite large in the backyard. The walls had some drywall damage that my brother recently repaired. The white walls on the longer sides are original wainscoting that took us FOREVER to prime and paint, since they have such small little rivets. The two end walls we primed and painted a sage green as accent walls, and my brother sealed the concrete floor as well. We still have to reinstall the trim work that will get a nice fresh coat of white paint along the bottom and top of the walls. This room will also get some indoor/outdoor commercial grade carpet when we install wood flooring in the house, to finish it off.

So there is the recap thus far! More small additions to come and hopefully we will get the flooring and cabinets ordered this week!

Wednesday, February 23, 2011

Bathroom Artwork

As a surprise to my brother, I am purchasing a photo as artwork for the bathroom, since there is a fairly large wall opposite the sink where an old medicine cabinet used to be. We patched the hole in the wall, but need to fill the space with more than just paint. And, since we live in Florida, and my brother loves to surf (and remember this design board?), I thought a vintage looking surf photo was just the pop of color we need in the bathroom. I have narrowed it down to two favorites:
Dan Merkel - Pipeline, Oahu, Hawaii -from here

Or
Hostee - Sur La Vague found here

Which would you choose? Stay tuned to see which one I picked!

Saturday, February 19, 2011

So Fresh And So Clean - Bathroom Update

Goodbye gray bathroom, hello bright! The title of this post comes from an Outcast song that not only reminds me of college, but how Fresh & Clean this all white bathroom looks!


The subway tile is gleaming, and I love how even the white floor tile looks bright, even with a matte finish (for safety reasons, a glazed tile would be very slippery when wet).The new Kohler tub, toilet, and sink are also new additions.


And as you can see from the pictures below, we also added the teak towel bars directly onto the white subway tiles, and that awesome outdoor light fixture above the sink. I have to get a different energy-efficient light bulb, because I don't like the look of the coiled one in the fixture, but that is a minor detail! All we need now are the finishing touches.... a little paint, a shower curtain and rod, some artwork (coming soon), and a pop of color from some new towels. I can't wait to show you the finished bathroom!

Monday, February 14, 2011

Last minute Free Valentines

Valentine's Day is here and for those last minute card ideas, and I came across the cutest e-Valentine's from none other than the fabulous Kate Spade. Go here to send yours today!

Also, Hi Friend Design has cute and free printable Valentine's that you can pass out to the office. Click here to download and print.

Happy Valentine's Day!

Sunday, February 13, 2011

Renovation Meets Cupid

This weekend, between demolition of my brother's kitchen and painting his man cave, we made several trips to Home Depot and Lowes. I remembered an idea I had seen in various outlets online, and decided to pick up a few freebie paint samples to make some quick Valentines. I took my Alphabet stamp kit (last seen here) and used them to make cute cards for my loved ones. Here's the quick project:

Pick out the letters that you will be using. I decided on Xs's and O's to keep things simple, and I LOVE U for my husband's card.


 At Home Depot and Lowes, I found some great paint swatches with shades of pink and red that worked perfect for the cards.


Just stamp on the letters or message. I really liked that the 3 colors made three great lines for wording.  Since the paint swatches have a semi-gloss finish on them, I recommend letting the ink dry for a while before you put them on envelopes or hand them out. They tend to smear. You could also take a hair dryer to them if you need them in a jiffy.

Here are the completed cards:
How cute are they?! Took me a whole 5 minutes to do about 10 of them. I then took a permanent black pen and signed my name. You can use this idea for any kind of card in an entire paint section full of color options, and the best part, they're free.

Saturday, February 12, 2011

Demolition- Kitchen Before and Now

Today we made MAJOR progress on the beginnings of my brother's new kitchen. Demolition started at approximately 9:30AM and continued through the day. I did bring in professionals to do the job, but must admit that I also got a chance to take a sledgehammer to the tile floor, which turned out to be highly therapeutic!

Below are some before pictures. This is the view from the front door. The dining room, where the pool table currently resides will be the dining room. Check out the small opening and half wall beyond the orange that is the entry point into the kitchen.
 This is the view from the right side of the living room. There is a large window overlooking the back yard that will become part of the kitchen. Also notice again the small opening into the kitchen from the other side and the half wall. Also, there is a rather large part of the wall that juts out into the living room and forms a corner where the couch currently butts up to it. This will be removed in demolition.


Here is the back side of the kitchen. This house was built in the 50's and has the 10' x 10' galley kitchen with the domed ceiling lights that is just hideous. All of that will be going away. The small window will remain, since it gives you a nice view while washing dishes. See the half wall to the right? It makes the kitchen seem smaller than it already is. The teeny tiny dish washer will also be removed. We are reusing the sink in a salvaged cabinet in the garage later, as it is still in great condition, and is cast iron, which is valuable too.The white laminate cabinets and gray counter tops will be the first to go!


This is the side of the kitchen that butts up to the living room wall. The cabinets to the right and left of the stove are so tiny, so we will be enlarging these as well. The appliances will be donated and replaced with my parents old stainless steel appliances that they had in their kitchen prior to their recent renovation. Why throw out perfectly good appliances when they can be reused?!


And, here begins the demolition!

 The cabinets were removed, as well as the domed ceiling. We are keeping the fluorescent lights up until we can get an electrician in to install new can lights, and to provide some light in the house during the demolition. The white tile back splash will also be removed.


Here is the progress half way through the day. As you can see, all appliances have been removed along with the cabinets. The half wall on closest to the camera has been removed, and they are in the process of removing the header to make the kitchen feel larger and combined with the area in front of that large window.
 And here is the finished demolition at the end of the day. You can see in this picture from the dining room side that they removed the half wall and widened the opening. It makes a larger entry way into the kitchen from the dining room.
 This is the view from the other side. Once the electrician comes out this week to tie off the hanging electrical outlets and switches and move them to different walls, then the guys can come back out to finish the drywall repairs. However, you can see that with removing the half wall and header, it really opens up the space!
Here is a view from the large window. Now you can see the dining room and the other side of the kitchen.
And remember that wall and the weird corner column that sat on this side? Scroll up if you can't remember. Now the kitchen is wide open and you can see the living room. It really is an incredible difference that taking a few walls out can make.

Stay tuned for more progress updates, as well as the shed pictures that we will finish painting tomorrow. There is SO much more work to be done, but it is going to be A-M-A-Z-I-N-G in the end. And we are putting the final touches on the bathroom in the process, so I will be posting more pictures soon.

Thursday, February 10, 2011

Love Actually Is All Around

As Valentine's Day approaches, I am reminded of a few items that I love, that happen to be perfect for gift giving this Valentine's Day:

Love Actually- One of the best LOVE stories that reminds us that LOVE is something we can find with many people in many different ways. It is everywhere around the world.

If you haven't seen this movie, you need to go out and BUY it. Don't rent it, you will never want to return it. I may just have to watch my copy this weekend.... again.... for the millionth-and-one time.


I also love mini cookies with royal icing from Cookie Mamas (on Etsy). I ordered their cute mini-heart cookies for the office this Valentine's Day, and they are soooo good. I love how they are bite sized, and even on your New Year's diet, you can't feel guilty about eating one or two!


 I do not own a pair of these (which may be astonishing to all of you who know about my shoe habit), but someday I will break down and buy them.... I really love Vivienne Westwood's Lady Dragon Slingback Pumps. The heart on these shoes "had me at hello", and I love just how many color combinations they come in as well. Perfect with the little black dress out on the town Valentine's Day, or any day for that matter.


Skip the chocolates and flowers! Here is a treat I really love.... Terra Valentine Cabernet Sauvignon. A great wine from Napa Valley, perfect for the Valentine's Day dinner, even at home. I love this cabernet and despite the name, will drink it year 'round!

And how could one resist anything RED from Kate Spade? And its name is just perfection: The Natalie Small Dot Cosmetic Case. If you know anything about me, you know I carry anything and everything I could possibly need in my purse. Screwdriver? Check! Medicine cabinet? Check! This cosmetic case may just have to come home with me as my carryall for traveling.


What are you coveting this Valentine's day?

Tuesday, February 8, 2011

Valentine's Day Flowers - A Week Early

I like to have flowers around my house whenever I can. I try to pick up the $5 bunches at Wal-Mart, and Sam's Club when I am there. This week, the flowers start to go up in price due to Valentine's Day, but I managed to snag some perfectly pink tulips for $6.

To jazz them up a bit, I took some leftover red velvet ribbon from Christmas, and these glittery wire centerpieces that I snagged at Wal Mart's after Christmas sale for $0.50 a bunch.
Now I have a Valentine's Day centerpiece that cost less than $7! I just change the water every couple of days and trim the stems to keep them fresh, and they will last over a week through Valentine's Day.

Monday, February 7, 2011

Bathroom Renovation : Lighting Update


I found a genius idea on a blog (and of course didn't save it for reference, so if you know the source, let me know so I can give them credit!). The blogger was having difficulty finding a bathroom light that didn't scream "I'm a Dressing Room", which coincidentally, was the same problem we were facing.  So instead, she picked up an outdoor light fixture to hang above the mirror, which is even better, because it can weather the humid elements of a bathroom. 

I described the light fixture to my brother, and he thought the idea was cool, but needed to see the fixture. I found one online at Home Depot that was similar, if not exact, to the one on the other blog. This past weekend, after going to see it in person, we purchased this Hampton Bay Outdoor Lantern for the bathroom light.

It has a bit of a nautical feel, and I love that light from it is not restricted with a shade. The clear glass bulb around the light bulb allows light to bounce off of all walls and angles. It is also much more chrome than in the photo above, which we liked to go with all the other chrome being installed in the bathroom.  It looks a little industrial, which compliments the white subway tiles, but also allows the other elements of the bathroom, like the teak accessories and Kohler faucets, to really stand out.


I can't wait to show you pictures of it installed this week! We're almost done!

SHOP