Showing posts with label Kitchen. Show all posts

Tuesday, May 31, 2011

Kitchen Reveal


At last, the kitchen reveal. It has been a lot of blood + sweat + tears, but it is done! I'll let the photos speak for themselves:


Left side of the kitchen, looking in from the door to the garage:


View AFTER:

Now here is the right side BEFORE:


And the AFTER:


And more of the right side, since we added the desk and extra storage cabinets that extend all the way to the wall:

And some more photos:


RIP dome ceiling!


It is truly AMAZING how a 10' by 10' kitchen can be extended and more functional by simply taking out its small half walls. And I am obsessed with the eat in island between the living room and kitchen.... it really opens up the space, and provides extra counters too!

More details about the elements to come.... How did we do??? 

Monday, May 23, 2011

The Kitchen Sink

When first designing the kitchen, I discussed how we had decided on a farmhouse sink here. We ended up purchasing the following:
This is the DOMSJO Double Bowl Farmhouse sink from IKEA. The price could not be beat ($299, but I see online it is $312), and she is huge!! I love the size, but not so much the weight.... she is made of solid porcelain, which I love for a sink, but getting her in and out of the car was no easy feat. Note to self, bring someone with you to IKEA to help you load it, since I was by myself and had to find two big strong employees to help load it. It also takes at least two people at home to get it back out of the car and into the house.

Now that cabinets are in (this is just a preview- I will post an update once the granite gets installed), here is DOMSJO in all her glory:

I love the ginormous size - you can actually set a large pot in the sink!- and her clean lines. We just have to add the faucet, garbage disposal, and drains, and she will be set!

Check back soon for the kitchen's final reveal!

Thursday, April 14, 2011

Refrigerator Update and Hostess Tip #6

Let's begin at the end-

Hostess Tip #6:
Never leave canned sodas (or carbonated drinks) in a new fridge if you are still unsure about the temperature setting. They could freeze and explode. All.over.the.new.clean.fridge.

And now to the beginning:
If you weren't getting a few laughs from the last post about setting up our new fridge, maybe you can from the fact that we had another issue with it last night. When I organized it, I happened to put the Diet Dr. Pepper soda cans at the top, since we drink them occasionally on the weekends, and I like mine pretty cold. I'm sure you can imagine what happens next, but let me clarify first. This was not the first time that a can has exploded on me, so I cautiously checked them on Tuesday night to make sure they were not frozen. I honestly did not think the fridge was as cold as our last one, so I thought they would be fine to leave them up there for another day and check them later.


Last night, we went to dinner at the in-laws house, so I didn't open our fridge until I was going to bed at 10PM to get some water. When I did, this is what shot out at me:


It was a DDP rocket!!! Seriously, there was this loud pop as I opened the door and  I instinctively curled into a ball on the floor with my arms curled around my head. There must have been some pressure built up in the fridge because it literally exploded open when I pulled on it, and a mangled DDP can with frozen soda still in it landed at my feet. After realizing what had just happened, I stood up from my duck & cover position to find that the entire inside of the clean new fridge had been covered in frozen brown soda. Another mangled can lay on its side still on the top shelf (the first casualty) and a third can lie in wait. I immediately removed the third can and put it in the sink to thaw out, while secretly praying that it too not explode all over my kitchen.

What is really fun about cleaning up after a frozen soda, is that while you are busy pulling out food and removing every shelf of your new refrigerator, the iced pieces of soda begin to melt, since the temperature is rising with the door open. This makes for more of a mess... think slushy. So basically, I cleaned the entire inside of the new refrigerator again last night.

And our ice maker still does not work.  The saga continues....

Monday, March 14, 2011

5 Weeks and Counting....

The kitchen cabinets for my brother's house have finally been ordered! The custom cabinets take 5 weeks until install, and there is a lot more to be done before they arrive. However, I am loving this progress, and the look of the new kitchen, desk, and eat-in bar area that we have designed. 

First, we chose white cabinets in a Thermofoil finish.  Thermofoil is a type of manufacturing where they wrap vinyl material over an MDF-type board. It lasts longer than regular laminate, and doesn't show seams like wood cabinets do over time, and the price point is also great. They have a long warranty, and are perfect for someone who needs low maintenance and easy cleaning options. You can read more pros and cons about Thermofoil cabinets here.

After pricing out Thermofoil cabinets at Home Depot, Lowes, and some local cabinet shops, we chose to go with a local cabinet shop who provided us the same kitchen at a lower price. What is nice about using them is that we will know the three guys who order, measure, and install the cabinets from start to finish, unlike the big chains, who have different departments for all aspects of the project. Also, if we have a problem in the future and under warranty, we can simply call them up and get them out to the house in the same day or week. It made the overwhelming experience just a little bit easier knowing that everything would be taken care of without the hassle.

In our designs, we chose a white cabinet, similar in pattern to the Martha Stewart line at Home Depot below:

 
This gives kind of a beachy feel, and will completely modernize the space. We have not yet chosen the counter tops yet, as those will be templated once the cabinets are installed, but are leaning towards a sandy granite top. 

 And without further ado, here is the new kitchen:

 
This is the kitchen if your back is to the fridge and stove. The window above the sink is existing, and we are keeping most of the cabinetry the same. A few minor changes: 

-My brother really wanted a farmhouse sink, and I had the same thought! The white, clean lines would really make the space more interesting, since it is so small. We found a porcelain white sink at Ikea for $299! Usually, farmhouse or apron sinks are between $700-1200 at Home Depot and Lowes, so even the kitchen designers were impressed about a great looking sink at an even better price!

-We are adding a full sized dishwasher, which had to go in place of some cabinets to the right of the sink. The old one was a mini dishwasher, which sat to the left of the sink. We have replaced it with a drawer for the trash can, which also solves the issue of the dog getting into the garbage! Also, because we took out the half wall to the right of the sink, we had the ability to add a third upper cabinet for the storage lost with the larger dishwasher.  


This is the same side if you turn 45 degrees to the right. We have taken the area to the right of the kitchen and made it into a more permanent desk and pantry area. Since my brother used to have a desk in front of this window anyway, I decided to carry the cabinets over to integrate it into the rest of the kitchen. The widow does sit lower, so we will simply drop the countertop down to desk height. I added a tall pantry and one set of upper cabinets in the corner, to maximize storage along this wall that was not being utilized before. Also, if you notice, the small bottom cabinets to the right of the desktop will be for files, and his computer can fit nicely into the corner nook or directly in front of the window.


If you turn around, the other side of the kitchen is the exact same as the before, since we had a fridge and large oven/stove to accommodate. The only difference is that I took out the wall to the left of the cabinets in order to extend the countertop to create a bar/eat-in kitchen. It also provides a view of some of the kitchen from the living room, which makes the entire space more inviting. We haven't figured the exact shape of the countertop extension yet, as I am not completely loving the roundedness of this mock-up. However, we don't have to worry about that until we template for the counters. It will accommodate 2-4 small bar stools, and will allow more people to be in the kitchen at the same time, which is ALWAYS where people congregate to during a party. It also provides additional counter space for food prep and small appliances. 

And here is a view of the entire kitchen coming in from the garage:
 
It really is amazing what small changes can have a BIG  impact in a tight space. Just a few more weeks and I can show you the real cabinets!

Sunday, February 27, 2011

Rennovation Additions


As any homeowner will know, no project is easy, or done without creating another project. In the process of demolition of the kitchen seen here, our next step was to patch the walls that we took out. It was decided then that an additional step would be to add a skim coat of plaster throughout the kitchen and dining room, as well as the ceiling, to help remove the 4 different textures on the walls that were running throughout the house and give it a more cohesive, finished feel. While this was not originally in our budget, it only makes sense to do it now, while there is a ton of drywall dust still settling and nothing in the rooms to move around or cover.


And since painting the new walls was the next step anyway, a good skim coat just preps the walls for a better paint finish. The kitchen and dining room feel so much more open and fresh! And let me tell you how nice it is NOT to have popcorn on the ceiling!

Also, while the crews were putting the final touches on the walls, we had an electrician come in to remove some of the old ceiling fans, move electrical and add can lighting in the kitchen, and add the new fixtures in the bathroom.The areas in which electrical was moved or removed were also patched.

The next addition that we were anticipating was pouring the concrete floor. In the living room, there was a 9'x8'x3" section that was lower than the rest of the floor. It may have been part of an old carport or garage at one time that was closed in, but it really chopped up the big living room as far as functionality goes. And since adding wood flooring is our next step, it would have cost us more to fit flooring and trim pieces in this section than it would to fill it in with concrete for one solid floor. Plus, it really lengthens the room and gives us more options for furniture arrangement. Here you can see the new floor.

We will have the flooring company out this week to measure and order the flooring, and since the material takes a few weeks to come in, it will give the concrete a time to set and dry. You never want to put flooring down over damp concrete, especially wood, because it will cause buckling or warping.

So while the progress has taken a few steps back as far as our original timeline goes, the additions that we have done will make the finished product so much nicer in the end. And skim coating the walls and pouring a concrete floor add more value than they cost in the long run.

And while the kitchen was being demolished and the walls were getting a nice coat of plaster, my brother and I were priming and painting the shed, aka Man Cave, where the pool table will eventually live. This is actually a finished shed that is quite large in the backyard. The walls had some drywall damage that my brother recently repaired. The white walls on the longer sides are original wainscoting that took us FOREVER to prime and paint, since they have such small little rivets. The two end walls we primed and painted a sage green as accent walls, and my brother sealed the concrete floor as well. We still have to reinstall the trim work that will get a nice fresh coat of white paint along the bottom and top of the walls. This room will also get some indoor/outdoor commercial grade carpet when we install wood flooring in the house, to finish it off.

So there is the recap thus far! More small additions to come and hopefully we will get the flooring and cabinets ordered this week!

Saturday, February 12, 2011

Demolition- Kitchen Before and Now

Today we made MAJOR progress on the beginnings of my brother's new kitchen. Demolition started at approximately 9:30AM and continued through the day. I did bring in professionals to do the job, but must admit that I also got a chance to take a sledgehammer to the tile floor, which turned out to be highly therapeutic!

Below are some before pictures. This is the view from the front door. The dining room, where the pool table currently resides will be the dining room. Check out the small opening and half wall beyond the orange that is the entry point into the kitchen.
 This is the view from the right side of the living room. There is a large window overlooking the back yard that will become part of the kitchen. Also notice again the small opening into the kitchen from the other side and the half wall. Also, there is a rather large part of the wall that juts out into the living room and forms a corner where the couch currently butts up to it. This will be removed in demolition.


Here is the back side of the kitchen. This house was built in the 50's and has the 10' x 10' galley kitchen with the domed ceiling lights that is just hideous. All of that will be going away. The small window will remain, since it gives you a nice view while washing dishes. See the half wall to the right? It makes the kitchen seem smaller than it already is. The teeny tiny dish washer will also be removed. We are reusing the sink in a salvaged cabinet in the garage later, as it is still in great condition, and is cast iron, which is valuable too.The white laminate cabinets and gray counter tops will be the first to go!


This is the side of the kitchen that butts up to the living room wall. The cabinets to the right and left of the stove are so tiny, so we will be enlarging these as well. The appliances will be donated and replaced with my parents old stainless steel appliances that they had in their kitchen prior to their recent renovation. Why throw out perfectly good appliances when they can be reused?!


And, here begins the demolition!

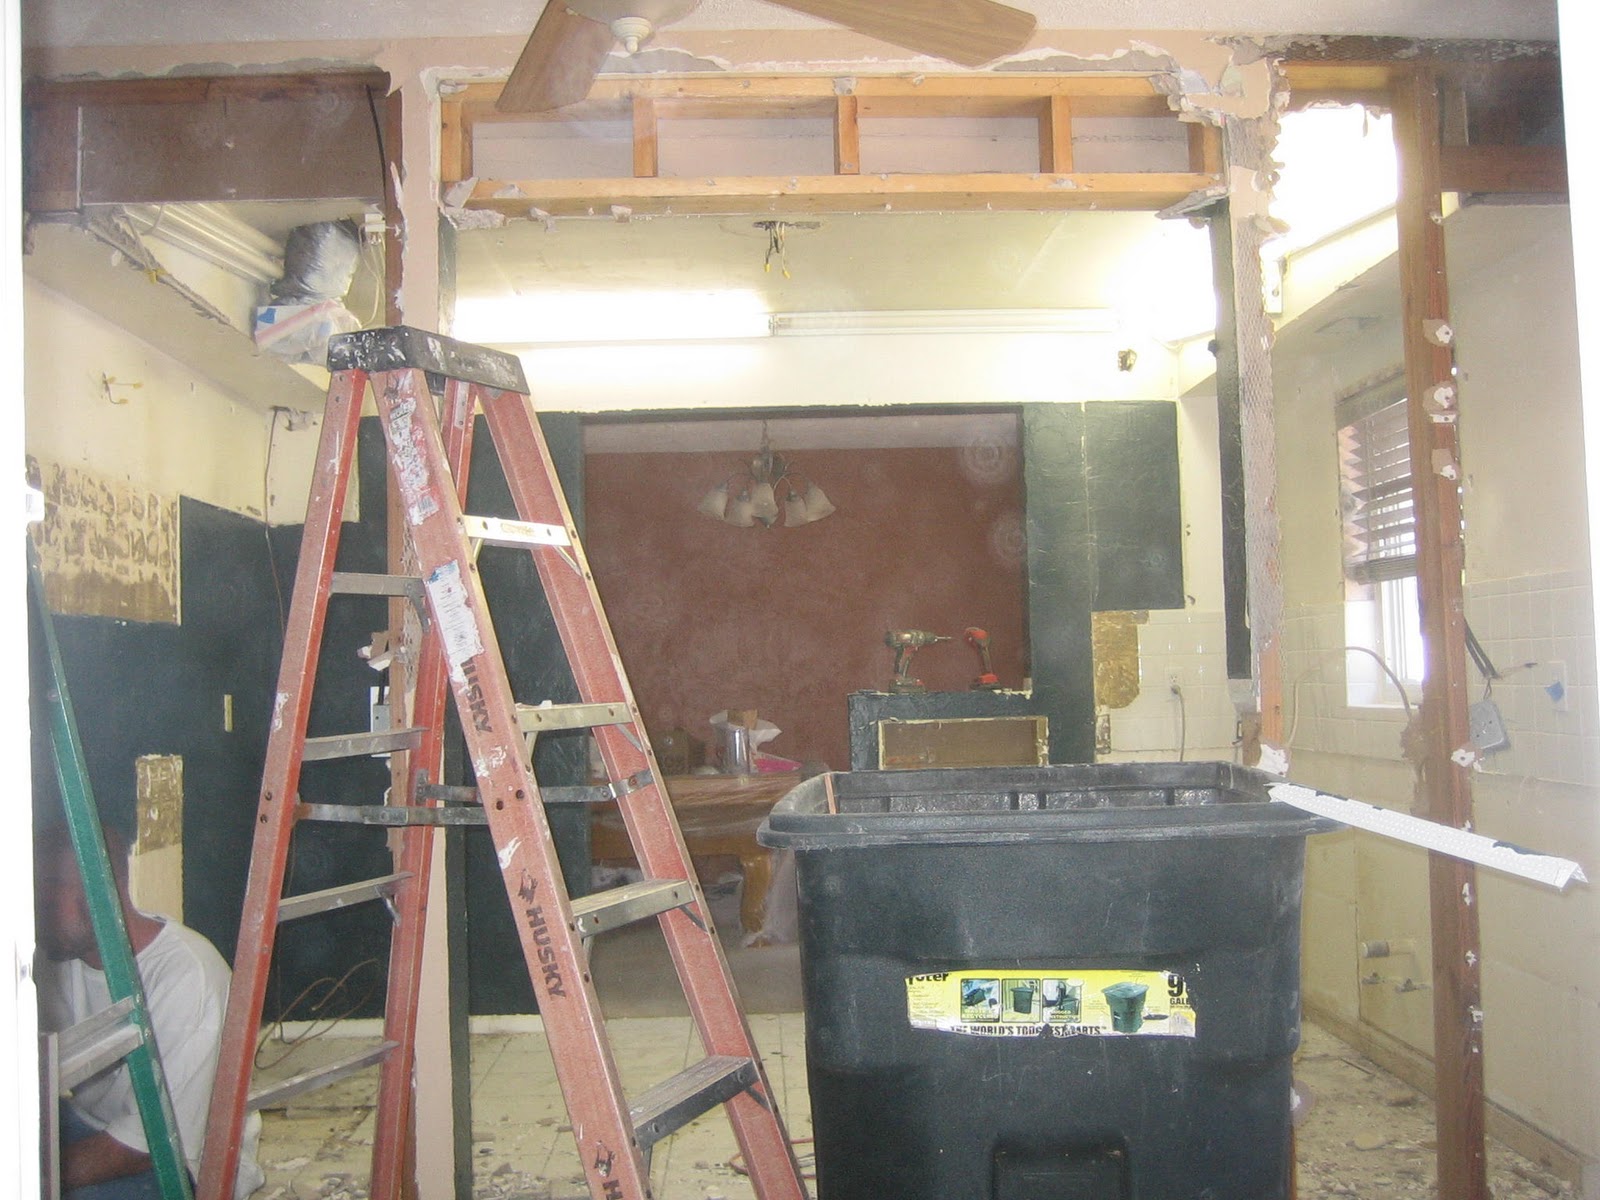
 The cabinets were removed, as well as the domed ceiling. We are keeping the fluorescent lights up until we can get an electrician in to install new can lights, and to provide some light in the house during the demolition. The white tile back splash will also be removed.


Here is the progress half way through the day. As you can see, all appliances have been removed along with the cabinets. The half wall on closest to the camera has been removed, and they are in the process of removing the header to make the kitchen feel larger and combined with the area in front of that large window.
 And here is the finished demolition at the end of the day. You can see in this picture from the dining room side that they removed the half wall and widened the opening. It makes a larger entry way into the kitchen from the dining room.
 This is the view from the other side. Once the electrician comes out this week to tie off the hanging electrical outlets and switches and move them to different walls, then the guys can come back out to finish the drywall repairs. However, you can see that with removing the half wall and header, it really opens up the space!
Here is a view from the large window. Now you can see the dining room and the other side of the kitchen.
And remember that wall and the weird corner column that sat on this side? Scroll up if you can't remember. Now the kitchen is wide open and you can see the living room. It really is an incredible difference that taking a few walls out can make.

Stay tuned for more progress updates, as well as the shed pictures that we will finish painting tomorrow. There is SO much more work to be done, but it is going to be A-M-A-Z-I-N-G in the end. And we are putting the final touches on the bathroom in the process, so I will be posting more pictures soon.

SHOP