Showing posts with label Holidays. Show all posts

Wednesday, July 4, 2012

Happy 4th of July

 
Happy 4th of July!!!

Wishing you all a fun and safe Fourth with your friends and families! 

My posting will be a little more sparse, since we are having so much fun with our sweet and funny Harper, but there exciting things coming up, so stay tuned! 

Sunday, April 8, 2012

Hoppy Easter!

After a busy weekend, I managed to whip up a simple but cute table for Easter dinner.


I took a large antique bowl, filled it with giant lemons from the tree outside, and then clipped some fresh gardenias and stuck them in. I finished it off with some egg garland, found at Michaels last year. 


A closeup of the beautiful, fresh centerpiece:


 Then I made all the napkins into bunnies, using this Martha Stewart tutorial. It was a little difficult, since the napkins we had were really thick. I just helped secure the napkin folds with a small clear rubber band.


Hope you all had a wonderful and hoppy Easter celebration!

Tuesday, February 14, 2012

Every Day is Valentine's Day....

photo from Etsy
Happy Valentine's Day!


My love letter:

For me, Valentine's Day was always a Hallmark holiday that I dreaded, even when I was with someone. I never understood why people waited until this one day to tell someone that they love them, or to shower them with roses and cards and candy. Any other day of the year is just as perfect as this one to say what you think, and mean what you say to those you love.

This past year has been filled with lots of ups and downs for me, which consumes the time I am not blogging... new loves, friends lost, change in location, cancer, job opportunities, and a sea of new adventures. Every day that I wake up, I am thankful and grateful for the life God has given me, and the love he has allowed me to experience and appreciate. So much that EVERY DAY is as special and filled with love as today. 

I am very appreciative for all of you readers who continue to inspire me and keep up this little blog with my creative and culinary endeavors. It certainly is one of the little things I cherish and look forward to, no matter how crazy or busy life is.

My Valentine's wish for you is to celebrate those friends and family members you love EVERY DAY, not just today. Make every day Valentine's Day!

Thursday, December 22, 2011

Some Last Minute Christmas Fun

Maybe a little glimpse into the world of Santa's reindeer will be all the help you need getting the kids ready for bed Christmas Eve.

Be sure to check out the Reindeer Cam, where you can see some of Santa's best eating, sleeping, and getting ready for their journey. And if you go to the site before 10am or 5pm, you can even catch Santa feeding them! So cute for all believers.


http://reindeercam.com/

Friday, December 16, 2011

Update to Holiday Decor

Just a quick update to our mantel decor. This past weekend, my husband's grandmother was giving all of her Christmas decor and ornaments to her grandkids, since it is to laboring to put it up every year. Among the boxes, I found four Danish-looking wood reindeer in all different sizes that would compliment my reindeer fireplace and mantle. Check them out:


Aren't they cute? I just love them, and their size is perfect. Here you can see them with the whole setup:


And since we finally got the lights and wreaths up on the outside, here is a glowing shot of the house:


Wrapping up my shopping and wrapping this weekend. Are you ready for Christmas?

Tuesday, December 13, 2011

Pretty Presents

As I finished wrapping most of our gifts (a few last minute additions are being shipped) last night, I kept thinking about how simple but pretty my gifts looked under our tree this year.

I love getting a deal on cute wrapping paper, and have been known to buy those little rolls from the Target dollar section, or  buy rolls of large wrapping paper after Christmas at 50% or 75% off. However, most of the time, the paper is thin, and not as cute the following year as you originally thought when you bought it at discount. This year, I was so pleased with my wrapping paper find, that I just had to share!


I ended up getting the brown paper with gold stars and red gingham at... the dollar store!! At $1 a roll, I think I bought 4 of each for all of the gifts!  And I love how the brown paper is thick and creases nicely. I also buy my Scotch tape in 2-packs from the dollar store.


The green fabric bows are made from giant spools of ribbon that I bought at Michaels on Black Friday. Seriously, I stock up every year on Black Friday at Michaels.... they have great sales, and this year, they had a coupon for an additional 30% off your entire purchase if you went before 9am. I bought four giant spools of ribbon, and total I paid $6. The gift tags I found at Target for $2 for a pack of 60, and the colors go perfect with the muted tones of the paper and ribbon.


So basically, for ALL my wrapping paper, bows, tags, and tape, I spent less than $20. And the best part is, I can use the left over wrapping paper for different events throughout the year! Can anyone beat that?!

Tuesday, November 1, 2011

I Can't Believe Its November....

...but at least I ended October like a Lady.

Lady Gaga, that is.
I am sooooo not a blonde.

So it is November 1, and my mother is already asking me for my Christmas list. Here are a few things that I have lusted after for a while.

I am in love with this bag from Zara:

I have always wanted this Pet's Eye View Camera for the dog, just to see what she gets into when we are not looking, but its just a little pricey:


And this gift just seems like a no brainer for me... the Baker's Edge Brownie Pan:


This Emerald horn bracelet from Furbish:


 And this Orange Chevron Throw, also from Furbish:


And if you haven't seen Furbish Studio or Jamie's funny and awesome bog, check it out here

I'm sure there will be plenty more things on my list this year... I just have to sit down and really think about what I want. What is on your list this year???

Happy November!

Monday, October 31, 2011

Happy Halloween!

Just wanted to wish you all a very Happy Halloween! Hope you have a fun night with a few Tricks and lots of Treats too!

PS- It is our dog Maybee's least favorite day of the year. I wonder why....

As Snoopy (she is a beagle after all!) in 2009
As a farmer - probably her least favorite- in 2007

Sunday, October 30, 2011

Roasted Pumpkin Seeds

One of my most favorite things to do after carving a pumpkin is roasting the seeds. And boy, did we have a lot of seeds from four pumpkins! While this colander does not seem like it is that full, it is the biggest one I have, and it took me almost a hour to get all the seeds clean and free of goop. 


First, wash the seed thoroughly under warm water, and get rid of any orange pumpkin goop. Dry the seeds off  as best you can on paper towels, before placing on a non-stick baking sheet.


Once you transfer them onto a baking sheet, shake the baking sheet until all the seeds are evenly distributed. 


Next, let the seeds dry out even more. Sometimes I leave them overnight on top of the oven, but for sake of time, I put them out in the warm October sun for about 2 hours. 


First, preheat your oven for 350 degrees.


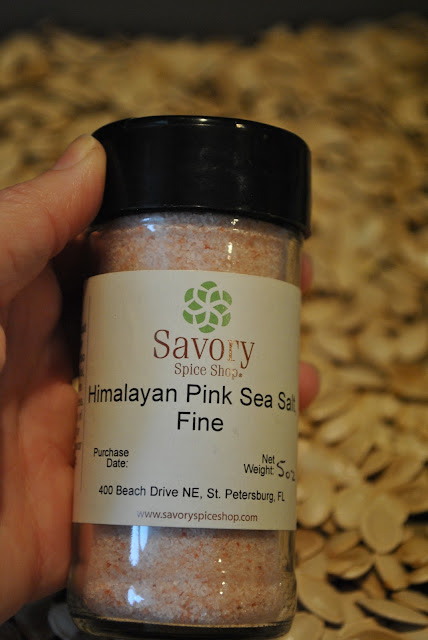
Next, decide what you want to top them with. In the past, I have used Tony Chachere's Creole Seasoning, which gives a nice salty flavor with a hit of heat. Yum! But this year, I decided to keep things simple, and sweet, especially since I have two pans full. The first pan I used Savory's Himalayan Pink Sea Salt, which gives a good salt, but not overpowering, flavor.


The second pan was the sweet stuff, using Savory's Pure Maple Sugar and Cassia Ground Cinnamon. 


I sprayed both sets of seeds with a little butter flavored PAM and then sprinkled the toppings on. 


Place in the oven and bake for 10 minutes. Then, using a spatula, move the seeds around, so that the toppings can get on both sides, and you aren't browning just one side of the seed. Bake for another 10 minutes, and remove from oven. Let cool for 10-15 minutes before eating, if you like them warm, or place them in baggies like I did to give to guests or save for later. Or serve them on Halloween night for a tasty and good for you treat!

Saturday, October 29, 2011

Pumpkin Carving

This morning, I invited my goddaughter Kinsley and her mom Amy over, as well as our friends Katie and her daughter Bree, and Janet and her baby Max for some good old-fashioned pumpkin carving! In Florida, with the humidity, pumpkins tend to rot quickly, so I always wait until a few days before Halloween to cave them.

Since it was raining outside, I decided to use my kitchen floor as our workspace (which is where I usually carve a pumpkin by myself anyway). I first laid down some newspapers to protect the floor, and then some dollar store Halloween plastic tablecloths. I put out two bowls, one for the guts without seeds, and one for the guts with seeds that we can separate, as well as my tools.


This year, I found some tools at Michaels that worked amazingly well. The 4 in 1 knife (far left) and the pumpkin scooper (second from left). Then I had an apple corer and spoon and knife. Both tools were on sale, and were less flimsy than I has originally thought. This pumpkin scooper actually allowed me to get all the guts out of my pumpkin in 5 minutes flat - AMAZING! The spoon and knife are my usual go to tools, since I have used them for years to carve pumpkins. Use whatever works best for you.


For snacks, since I was catering to 3 year olds, I made peanut butter and blackberry jam sandwiches and cut them into pumpkin shapes with a cookie cutter. Raisins too, of course, since all 3 year olds love raisins.


And something my mom used to make for us every Halloween: Blood and Bones. Its really healthy microwave popcorn with Smart Balance butter, melted and colored with red food coloring poured over it.

I found the cutest things at Target... spider shaped silicone cupcake molds. You simply make the cake mix, pour in the mold, and bake as usual. Then top with icing and googly eye sugar candies and black glitter gel icing, and you have yourself some spider cupcakes. I also made ghosts from an old Halloween silicone baking pan I had with the leftover cake mix. They came out pretty darn cute, and yummy too!


Here is my dining room, where the girls had Halloween crafts to work on while the moms used the sharp knives, as previously seen here


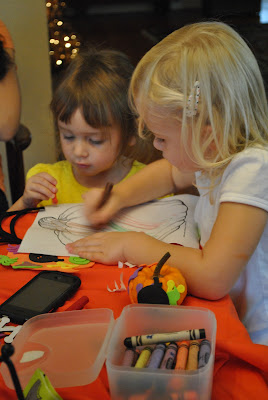
Since we had to keep them occupied, I went to Michaels and found some really cute foam pumpkins and a whole box of peel and stick Halloween shapes and letters for them to decorate.


My mother, the old kindergarten teacher, also gave me a box of big crayons and some black and white photocopies of pumpkins that they could draw on as well.

 
The girls got right to work on their decorations, as Janet and baby Max supervised. How cute is he in his Curious George Halloween onesie?!


Here's Bree after checking in on mom Katie carving their pumpkin.   


Katie used one of the templates from the pumpkin carving book that comes with the set of mini tools. Their ghostly pumpkin came out amazing!!!


Kinsley and mom Amy had two large pumpkins to carve (I actually carved the one on the left, per Miss Kinsley's instructions), and they turned out great! One is a happy pumpkin and the other is a bit scary... a perfect combination!


And here are Amy and Kinsley with all their pumpkins. You can see Kinsley got to work and put lots of sticky foam shapes on the smaller two. I think we're all now ready for Halloween!


Hours after they left, I finally go around to carving my own pumpkin. I made her a witch (notice the mole on her nose, and spaced out gagly teeth?!). She will have a hat tonight too. 


Here she glows:


Notice the ears. I give all my pumpkins ears every year. I just like that something on the sides of the pumpkins glow too!


Now I'm ready for Halloween! Did you carve your pumpkin yet?

SHOP