Fall is here, and my favorite thing about fall is PUMPKIN. Anything Pumpkin. This past weekend, I decided to whip up Pumpkin Pancakes.
I cheated a little bit and used Bisquick to make the pancake base, and canned pumpkin and pumpkin pie spice to make them delicious!
Add oil, milk, and eggs to the Bisquick per the directions on the box for 8 pancakes. Mix well.
Next, I added 1/4 cup canned pumpkin, 1 Tbsp Pumpkin Pie Spice, and 1 Tbsp sugar just to sweeten things up. You could used the canned pumpkin pie filling, which already has the spice and sugar in it, but I wanted to control the amounts of spice and sugar. Mix well
Heat a non-stick skillet over medium heat, and spoon out a few pancakes, leaving an inch or two between them.
Once the pancakes begin to brown on the edges and bottom, and the tops have small bubbles, flip them and cook the other side.
Serve with real Maple Syrup and a little bit of whipped cream for a delicious fall breakfast! Enjoy!
Showing posts with label Recipe. Show all posts
Friday, November 2, 2012
Tuesday, May 15, 2012
Key Lime Mini Pies
In celebration of Mother's Day on Sunday, we had a large family cookout at my parent's house. My mom asked me to make her Key Lime Pie recipe, originally from the PierHouse restaurant in Key West. She has had this recipe as long as I can remember, and it is by far my favorite Key Lime Pie, perfect for those warm summer nights. However, in true FTH form, I tweaked the recipe to make MINI Key Lime Pies, and I have to tell you, I was thrilled with the results! Here's how to do it:
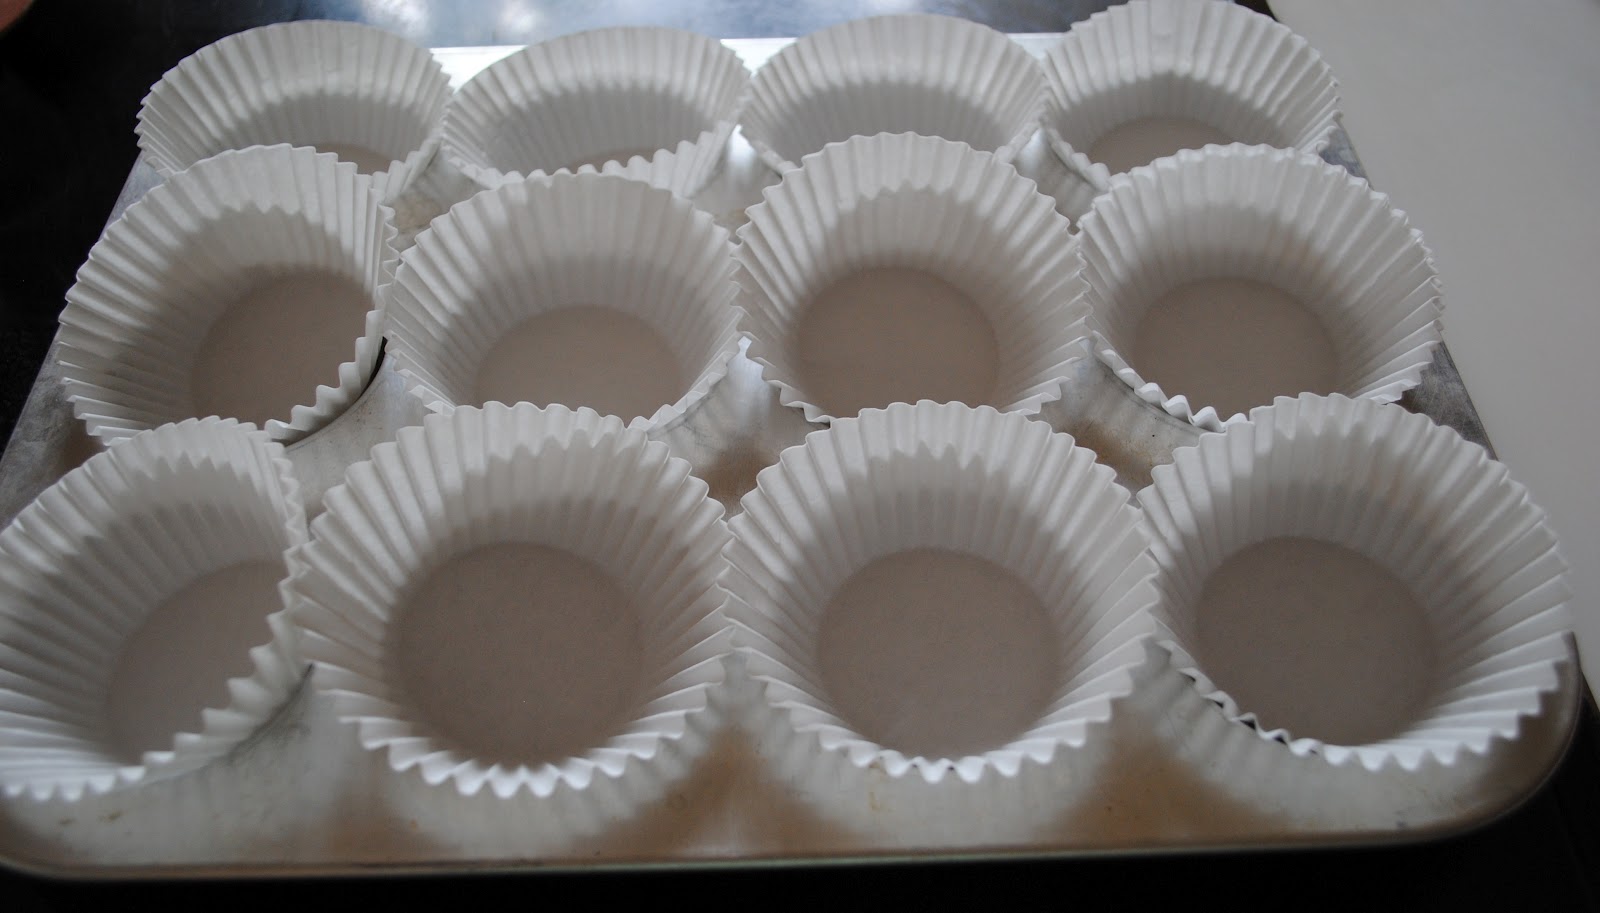
Get a 12-count muffin tin and line the tin with paper baking cups. I try not to use the foil ones, as they sometimes continue to cook the dough inside after removing from the oven.
Next, prepare the Graham cracker crust with the following ingredients:
2 cups graham cracker cookies (crushed) or 2 cups of boxed crushed graham cracker crust (HoneyMaid)
1/4 cup sugar
3/4 cup butter, melted
Combine all the ingredients until well blended.
Next, I filled each baking cup with one heaping Tablespoon of the graham cracker crust mixture. You may have a little bit left over, but just set aside until the next step.
Using your fingers, press the crust mixture into each cup, getting it evenly distributed on the bottom, and 3/4 of the way up the sides of the baking cup. This will actually help the baking cups sit down into the pan, and make sure the crust is evenly distributed. Use some leftover crust mixture to even out the sides of each baking cup.
Place pans into the refrigerator to chill until pie filling is ready.
For the filling:
4 eggs separated (only the yolks will be used)
1 14oz can of sweetened condensed milk
1/2 teaspoon cream of tartar
1/2 cup key lime or Persian lime juice (we like the Aunt Nellie's brand of key lime juice, but if you can't find it at your local grocery, regular bottled lime juice will do). Or if you have some extra time, squeeze juice from fresh limes.
Preheat the oven to 325 degrees. Place the egg yolks into a bowl and using an electric hand mixer, beat the egg yolks on high until thick and light in color.
Next, add the sweetened condensed milk, and mix on low speed.
While keeping the mixer on slow speed, add half the lime juice and cream of tartar.
Once that is mixed in well, add the remaining lime juice and mix until well blended. It should be thick and creamy!
Remove the crusts from the fridge, and using a small soup spoon or ladle, pour the pie mixture into the crusts.
Be sure to fill them up to the top of the crust, as they will condense a bit after baking.
Bake for 10-15 minutes (mine took about 15-16 minutes, but I checked them often) until the middles are firm. Remove from the oven, and chill in the refrigerator for about 1-3 hours.
Right before you are about to serve them, remove them from the fridge and top with light whipped cream and a lime slice for a pretty presentation!
These got rave reviews, mostly because the crust was thick and it was the perfect size dessert. If you notice in pictures, I actually made 24 mini pies, so I simply doubled the recipe above. And if you want to make a regular Key Lime pie, it is the same recipe and cooking instructions, just simply add the pie crust to a 9" pie pan. Here's to summer baking!!
Get a 12-count muffin tin and line the tin with paper baking cups. I try not to use the foil ones, as they sometimes continue to cook the dough inside after removing from the oven.
Next, prepare the Graham cracker crust with the following ingredients:
2 cups graham cracker cookies (crushed) or 2 cups of boxed crushed graham cracker crust (HoneyMaid)
1/4 cup sugar
3/4 cup butter, melted
Combine all the ingredients until well blended.
Next, I filled each baking cup with one heaping Tablespoon of the graham cracker crust mixture. You may have a little bit left over, but just set aside until the next step.
Using your fingers, press the crust mixture into each cup, getting it evenly distributed on the bottom, and 3/4 of the way up the sides of the baking cup. This will actually help the baking cups sit down into the pan, and make sure the crust is evenly distributed. Use some leftover crust mixture to even out the sides of each baking cup.
Place pans into the refrigerator to chill until pie filling is ready.
For the filling:
4 eggs separated (only the yolks will be used)
1 14oz can of sweetened condensed milk
1/2 teaspoon cream of tartar
1/2 cup key lime or Persian lime juice (we like the Aunt Nellie's brand of key lime juice, but if you can't find it at your local grocery, regular bottled lime juice will do). Or if you have some extra time, squeeze juice from fresh limes.
Preheat the oven to 325 degrees. Place the egg yolks into a bowl and using an electric hand mixer, beat the egg yolks on high until thick and light in color.
Next, add the sweetened condensed milk, and mix on low speed.
While keeping the mixer on slow speed, add half the lime juice and cream of tartar.
Once that is mixed in well, add the remaining lime juice and mix until well blended. It should be thick and creamy!
Remove the crusts from the fridge, and using a small soup spoon or ladle, pour the pie mixture into the crusts.
Be sure to fill them up to the top of the crust, as they will condense a bit after baking.
Bake for 10-15 minutes (mine took about 15-16 minutes, but I checked them often) until the middles are firm. Remove from the oven, and chill in the refrigerator for about 1-3 hours.
Right before you are about to serve them, remove them from the fridge and top with light whipped cream and a lime slice for a pretty presentation!
These got rave reviews, mostly because the crust was thick and it was the perfect size dessert. If you notice in pictures, I actually made 24 mini pies, so I simply doubled the recipe above. And if you want to make a regular Key Lime pie, it is the same recipe and cooking instructions, just simply add the pie crust to a 9" pie pan. Here's to summer baking!!
Tuesday, April 3, 2012
Lemongrass Chicken and Thai Vegetables
This past week, my mother in law told me that she had a lemongrass plant outside that she had never used to cook with.
Being a lover of Asian lemongrass flavorings, I decided to make dinner with it one night. I couldn't find any recipes that I loved, so I took some basic ingredients and combined them to make a lemongrass chicken with stir-fry vegetables.
First, I clipped a couple long lemongrass leaves, and washed them thoroughly, and cut them in half. Next I trimmed up my chicken breasts, cut in smaller halves, and sprinkled with garlic salt.
Next, I wrapped the chicken breasts in the lemongrass leaves and placed them in a shallow baking dish. I threw in a Thai Chili for a little flavor.
Next, I poured in about half a can of coconut milk and some lime peel (I use the rest of the limes later), and baked at 350 degrees for 30 minutes.
While the chicken was cooking, I filled a skillet with white onions, green onions, broccoli, red peppers, portobella mushrooms, and about 1tsp of thai chili sauce to give a little more flavor.
As the vegetables heated up, I added a little sesame oil (1 Tbsp) and just a dash of soy sauce (about 1 tsp). I like the fresh flavors of the vegetables, so I don't like a ton of sauce with them.
Once the chicken breasts are cooked, I took them out of the pan while I prepared the rice (Uncle Ben's 90 second brown rice).
Simply take the package of brown rice and rip open the top according to the directions. Add 2 Tbsp of the leftover coconut milk, and cook in the microwave for 90 seconds. Transfer to a bowl and stir well. Use the remaining lime, cut in wedges, to lightly juice the rice. Top with the lemongrass chicken and vegetables for a delicious meal!
When I make this again, I think I may marinate the chicken overnight in a coconut milk and lemongrass mixture, and then remove the chicken and cook them alone in a pan. The chicken had great flavor... definite lemongrass flavoring that was subtle, and the coconut milk was not overpowering, but the coconut milk was just a little more congealed than I had anticipated. I may also throw some lemongrass in with the vegetables next time too!
Let me know if you have a good lemongrass based recipe to try... I am all about experimenting with this!
Being a lover of Asian lemongrass flavorings, I decided to make dinner with it one night. I couldn't find any recipes that I loved, so I took some basic ingredients and combined them to make a lemongrass chicken with stir-fry vegetables.
First, I clipped a couple long lemongrass leaves, and washed them thoroughly, and cut them in half. Next I trimmed up my chicken breasts, cut in smaller halves, and sprinkled with garlic salt.
Next, I wrapped the chicken breasts in the lemongrass leaves and placed them in a shallow baking dish. I threw in a Thai Chili for a little flavor.
Next, I poured in about half a can of coconut milk and some lime peel (I use the rest of the limes later), and baked at 350 degrees for 30 minutes.
While the chicken was cooking, I filled a skillet with white onions, green onions, broccoli, red peppers, portobella mushrooms, and about 1tsp of thai chili sauce to give a little more flavor.
As the vegetables heated up, I added a little sesame oil (1 Tbsp) and just a dash of soy sauce (about 1 tsp). I like the fresh flavors of the vegetables, so I don't like a ton of sauce with them.
Once the chicken breasts are cooked, I took them out of the pan while I prepared the rice (Uncle Ben's 90 second brown rice).
Simply take the package of brown rice and rip open the top according to the directions. Add 2 Tbsp of the leftover coconut milk, and cook in the microwave for 90 seconds. Transfer to a bowl and stir well. Use the remaining lime, cut in wedges, to lightly juice the rice. Top with the lemongrass chicken and vegetables for a delicious meal!
When I make this again, I think I may marinate the chicken overnight in a coconut milk and lemongrass mixture, and then remove the chicken and cook them alone in a pan. The chicken had great flavor... definite lemongrass flavoring that was subtle, and the coconut milk was not overpowering, but the coconut milk was just a little more congealed than I had anticipated. I may also throw some lemongrass in with the vegetables next time too!
Let me know if you have a good lemongrass based recipe to try... I am all about experimenting with this!
Tuesday, February 21, 2012
Wild Rice Medley - Two Ways
We went to a party this past weekend, and I ended up hovering around the most amazing dish of wild rice and vegetables. I asked the chef how they made it, and it was so easy and so delicious that I knew I had to make a similar version for myself this week! There are actually two ways to make this dish, so I will show you the first way, and then tell you how they prepared it. The ingredients are the same, and both ways are equally delicious
Ingredients:
Wild Rice (I used two 90 second Uncle Ben's packets)
Chicken breast, sliced
1 clove of minced garlic
Broccoli
White or Yellow Onion, chopped
White Button Mushrooms
Red Pepper, chopped
Newman's Own Oil & Vinegar Salad Dressing
Crumbled Fat Free Feta Cheese
Salt and Pepper
Recipe #1
Since my camera had a dead battery, it didn't occur to me until halfway through the cooking process to take photos with my iPad. Sorry for the graininess, but here's what you missed:
Cook the chicken slices in a skillet with a little garlic. While the chicken is cooking, chop the onion, pepper, broccoli, and mushrooms. Toss in the pan.
These are the two ingredients that truly make this dish.
Once you get the vegetables in with the chicken, add about 1/4 cup of the salad dressing to the pan, and cook over medium high heat. Be sure to toss them well so that they can soak up the flavors of the dressing.
Cook until the onions and broccoli are soft. Remove from heat, and while it is cooling down, cook your rice (90 seconds). If you don't use bagged rice, you may want to cook your rice before you cook the other ingredients and set aside.
Add the rice, and about 1/4 cup of the crumbled feta cheese, and lightly toss. I know it sounds like an odd ingredient, but as it melts into the rice, it makes the rice and dressing creamy. You also want to let the mixture sit for a few minutes before tossing again, as the rice needs to soak up the remaining dressing that has not cooked off.
After a few minutes, add a bit of salt and pepper, toss well, and serve warm.
Recipe #2
Use the same ingredients above. Cook the chicken with the mushrooms and onions only, and cook the rice ahead of time, and allow these to cool completely. Chop the broccoli and pepper and leave them raw. They will add some crunch to the mixture.
In a large bowl, toss the chicken, mushrooms, onions, broccoli, peppers, and rice, and add in the salt, pepper, dressing and feta cheese. Toss well.
Refrigerate for 1 hour or more so that the mixture is cold, and the rice and veggies have had a chance to soak up the dressing. The mixture should be almost creamy or sticky in texture, so if it is too dry, add a little more dressing as needed.
Serve this cold or at room temperature to guests.
I actually ate the leftovers cold from the dinner above, and it tasted just the way their mix did at the party. However, I like some of the veggies a little crisp, so I think in the future, I would serve it cold with the raw veggies. Either way, it is so simple and delicious!
Thursday, February 16, 2012
Mini Lasagnas
As many of you may have seen on Pinterest, Mini Lasagnas are all the rage. One day at the grocery store, I picked up ingredients to make my own version, and when a movie night with friends presented itself, I whipped up mini lasagnas for everyone. Ingredients:
1/2 lb ground beef
1/2 lb ground Italian sausage
Ricotta Cheese (I use fat free)
Shredded Italian blend cheese or mozzarella
1 Can Crushed tomatoes (to make sauce, or you can buy sauce- homemade is always better though)
Lemon Juice
Oregano
Basil
Garlic salt
Wonton Wraps (to use in place of noodles)
I found the wonton wraps in the tofu section in with the fresh fruits and vegetables. Publix was out, so I went to Fresh Market instead. Many recipes online tell you to use broken lasagna ready-to-bake noodles, but I wanted to try the lighter, crispy wontons, and I was pleasantly surprised.
I also love to make my own spaghetti sauce. I buy the Tuttorosso crushed tomatoes from SweetBay grocery. They have basil already in them, and a really rustic Italian flavor. I simply pour in a bowl, add a splash of lemon juice, and add in some crushed oregano and more basil (crushed with my mortal and pestle to release the oils of the herbs). Voila! Homemade pasta sauce that is to die for!
To make the mini lasagnas, preheat your oven to 350 Degrees. In a skillet, brown your beef and Italian sausage. I love the combination of both beef and sausage for a more rustic flavoring. You could easily substitute the beef and sausage for ground turkey, or something more decadent like veal or venison too.
While the meat is browning, spray a muffin tin with a non-stick cooking spray, and gently lay the wonton noodles in each cup. I used 2-3 per cup, and I liked the edges to be overhanging a lot because they would get crispy at the end.
Next, in a bowl, add a little oregano and garlic salt to the Ricotta cheese. This just peps up the flavor a bit.
Add the ricotta cheese to the wonton cups. Be sure to not fill them over half way, as more ingredients need to be added. Press down the cheese, so that the wontons fill the entire bottom of the tin.
Next add about a teaspoon of your sauce, and the browned meat on top. You could mix these together first if you'd like. I simply pressed the meat into the sauce once it was in the cup.
Top with your shredded Italian cheese, being sure to cover most of the ingredients in each cup. This will keep the sauce and meat from bubbling out.
Bake at 350 degrees for about 30 minutes, or until the top of the cheese is browned, and the wontons are crispy. To remove the mini lasagnas from the tin, simply lift out. If they happen to be a little stuck, you didn't use enough cooking spray, so scoop out with a spoon. Serve and enjoy!
I found these to be a perfect potion size for guests. Some people went back for a second, but most were pretty satisfied with just one. They also save great for leftovers the next day. I think it would be an easy recipe to whip up when just cooking for two, as long as you have the ingredients on hand. No need to make a whole muffin tin full, just make four or six, and unlike traditional lasagna, you won't be stuck with an entire pan of lasagna that will take you a week to eat. Hope you enjoy!
Thursday, February 2, 2012
Warm Crab Dip
At the Under The Sea baby shower, the warm crab dip was a huge hit! It is so easy, and would make a great dip for this weekend's Super Bowl parties too.
Here's the recipe:
-1 can fancy lump crab meat
-1 package (1.5 cups) shredded Swiss cheese
-1 8oz package of cream cheese (I used reduced fat)
-1/3 cup mayonnaise (I used reduced fat)
Mix all the ingredients together in a bowl, saving about 1/4- 1/2 cup of Swiss cheese for the top . Preheat the oven for 350 degrees. Spoon ingredients into a heat save dish, and then spread the remaining Swiss cheese on top. Bake for 15-20 minutes, or until top of cheese starts to brown. Serve warm with your favorite crackers.
For an extra little twist, you can add 1 tsp Old Bay seasoning or creole seasoning for a little kick. Even a sprinkle of paprika will liven it up a bit. Just watch you don't put too much or it might turn out a little salty.
Here's the recipe:
-1 can fancy lump crab meat
-1 package (1.5 cups) shredded Swiss cheese
-1 8oz package of cream cheese (I used reduced fat)
-1/3 cup mayonnaise (I used reduced fat)
Mix all the ingredients together in a bowl, saving about 1/4- 1/2 cup of Swiss cheese for the top . Preheat the oven for 350 degrees. Spoon ingredients into a heat save dish, and then spread the remaining Swiss cheese on top. Bake for 15-20 minutes, or until top of cheese starts to brown. Serve warm with your favorite crackers.
For an extra little twist, you can add 1 tsp Old Bay seasoning or creole seasoning for a little kick. Even a sprinkle of paprika will liven it up a bit. Just watch you don't put too much or it might turn out a little salty.
Wednesday, January 25, 2012
Use What You've Got: Fried Rice
Being pregnant changes the way you cook. I don't have any cravings, but sometimes when something sounds good, I feel the need to cook it asap. The only problem being that I have really hated going to the grocery store on a regular basis, so I am in a Use-What-You've Got mentality of cooking.
I was really in the mood for some fried rice, but didn't want to order it from the local Chinese takeout place for fear of too much sodium/MSG/unknown ingredients. So I made my own (maybe it is more of a stir fry - you decide!), and it was even more delicious than what I could have ordered to go. Here it is:
First, get a wok or large deep skillet and a non-stick spatula. For some reason, my family has always had a wok, and it comes in quite handy for good stir fry, or the occasional Sunday brunch when I want to make Cafe du Monde beignets. I feel a craving coming on....
Anyway, heat your wok or skillet to medium heat.
Next, gather your ingredients. I had the following:
-Basmati Ready Rice (makes dinner done faster, and the perfect portion size for 2 people)
-Low sodium soy sauce
-Sesame oil
-Yellow onion
-Garlic (I used Korean black garlic for a truly Asian flavor)
-Sliced chicken breasts
-Green Beans
I typically like broccoli and sugar snap peas in my fried rice, but like I said, its a use-what-you-have dinner, so all I had were onions and green beans. You could also substitute frozen shrimp for the chicken, or any beef or pork you may have on hand. You can also add the typical fried egg, but I chose to skip that ingredient this time. While the pan is warming up, go ahead and prepare your chicken breasts if you have not done so already. I cut mine into bite sized pieces.
Special Note: As mentioned above, if you wanted to add the typical egg, go ahead and fry it up in the wok or skillet before cooking anything else. Simply break it into the pan, and as it starts to cook, break it apart into small pieces with the spatula. Once it is cooked, remove from pan and set aside. You will add it back in later.
If you prefer no egg, then go ahead and add about 2 Tbsp of sesame oil to the pan, and using the spatula, swirl it around a bit to help coat the edges.
Next add your chicken, and cook thoroughly. Toss occasionally.
Since I was using fresh green beans, they take a little longer to cook than other vegetables. When the chicken was almost cooked through, I added the beans so that they could get a nice coating of oil and cook while I was prepping the other ingredients.
While the beans were cooking, I chopped the onion, and put two cloves of the black garlic into a garlic press. If you have never tasted black garlic, you really should try it. I get mine from the Savory Spice Shop, but most Asian markets have it as well. Its is not bitter like regular garlic. It is a little more sweet and is very soft. I have eaten mine just spread on a piece of toast right out of the skin. Delicious! No need to roast these garlic heads! Anyway, they have a fragrant aroma and give a little punch of flavor to the fried rice.
Once the green beans (or other vegetables) are about half way done cooking, add in the garlic and onion.
Toss those around to get a little coating of any leftover sesame oil, and then add about 2 Tbsp of low sodium soy sauce.
Continue cooking until onions are soft, chicken is nicely browned, and all the flavors have been infused.
Next, I cooked two packages of the basmati rice in the microwave (you can't beat 90 seconds!) and added it to the pan.
Be sure to toss well with the chicken and veggies, and cook for another 5 minutes or so until the sesame oil and soy sauce have soaked into the rice. If you need a bit more juice, just add a little splash of soy sauce, or even some lime juice for a kick.
Turn off the wok or skillet, serve and enjoy!
Subscribe to:
Posts (Atom)