
I searched online for what I had in mind, but alas, all the whale shaped cakes were 2 dimensional, as in a decorated sheet cake. Our mom to be deserved a delicious cake and one that was really cute too! So I took photos as I went along in the event that it turned out close to what I had envisioned, and I am happy to say, I now have a bit of a tutorial for you! Its a long one, so maybe just glance through it unless you are really determined to make it in the future! It takes a good amount of time and patience, but the end result is so worth it!
 I first started with two boxes of Funfetti cake mix, vegetable oil, water, and eggs. Mix ingredients per the directions on the box. Confession: I actually bought 3 boxes in the event I screwed up the cake that took 2 boxes and needed to make simple cupcakes for the party!
Bake the cake to the instructions on the box. I actually cooked mine for the maximum time it stated, as I did not want the cakes too soft, since I would be stacking them. For this cake you will need one rectangular 9" x 13" pan (box #1) and two 9" round cake pans (box #2 divided evenly), and be sure that the pans are greased well, as it will help to get the cakes out later in one piece.
We will skip ahead, as you all should know how to mix cake batter! Here are the cakes when fully cooked:

Make sure the cakes are cooled completely. I actually stuck the pans in the fridge for about 20-30 minutes to cool them down faster.
Next, get a large sturdy platter out that you will serve the cake on. It is easiest to use this from the beginning, because once you start stacking the cakes, it will be nearly impossible to move otherwise. Since I was a little unprepared for this, I ended up using a disposable foil pan that I couldn't really dress up in the end. I would recommend getting a clear or blue platter that will hold a 9"x13" cake without spilling over the edges.
Carefully cut around the edges of the 9"x13" cake, and invert the cake pan on top of platter. The cake should come out smoothly.

Next, I could have freehanded the fish shape cut, but I decided to be extra careful, since this was the base and foundation of the whole cake. I took a large piece of paper I had in my craft drawer, and cut a circle for the head and a tail. The circle size was actually traced from the bottom of one of the round cake pans, so that when you stack them, the cakes making up the head will all be about the same size. I drew in the black lines on the photo where I would cut around the paper so you can envision it:

And here is after the cuts:

Be sure to try to keep the left over pieces whole, as we will be using some of these later. No eating cake bits until the end!!!

Here is how the base looks without the template.

 Next, get out one can of frosting. I don't really care for icing unless it is Cream Cheese flavored. I bought 3 cans of the whipped cream cheese, as I knew I would be doing multiple layers of frosting and wanted things thin and creamy. You will need at least 3 cans. One is used to "glue" the cake pieces together, and two more for the decorative frosting once the cake is molded.
Using a flat spatula or knife, spread a thin layer of frosting on the "head" of the whale. Don't worry about it being perfect, as you won't see it later! It should look like this:

Next, take one of the round cake pans and cut around the edges before turning it upside down on top of the frosting.

Repeat the frosting again on this layer in order to prep for the third layer of the "head".

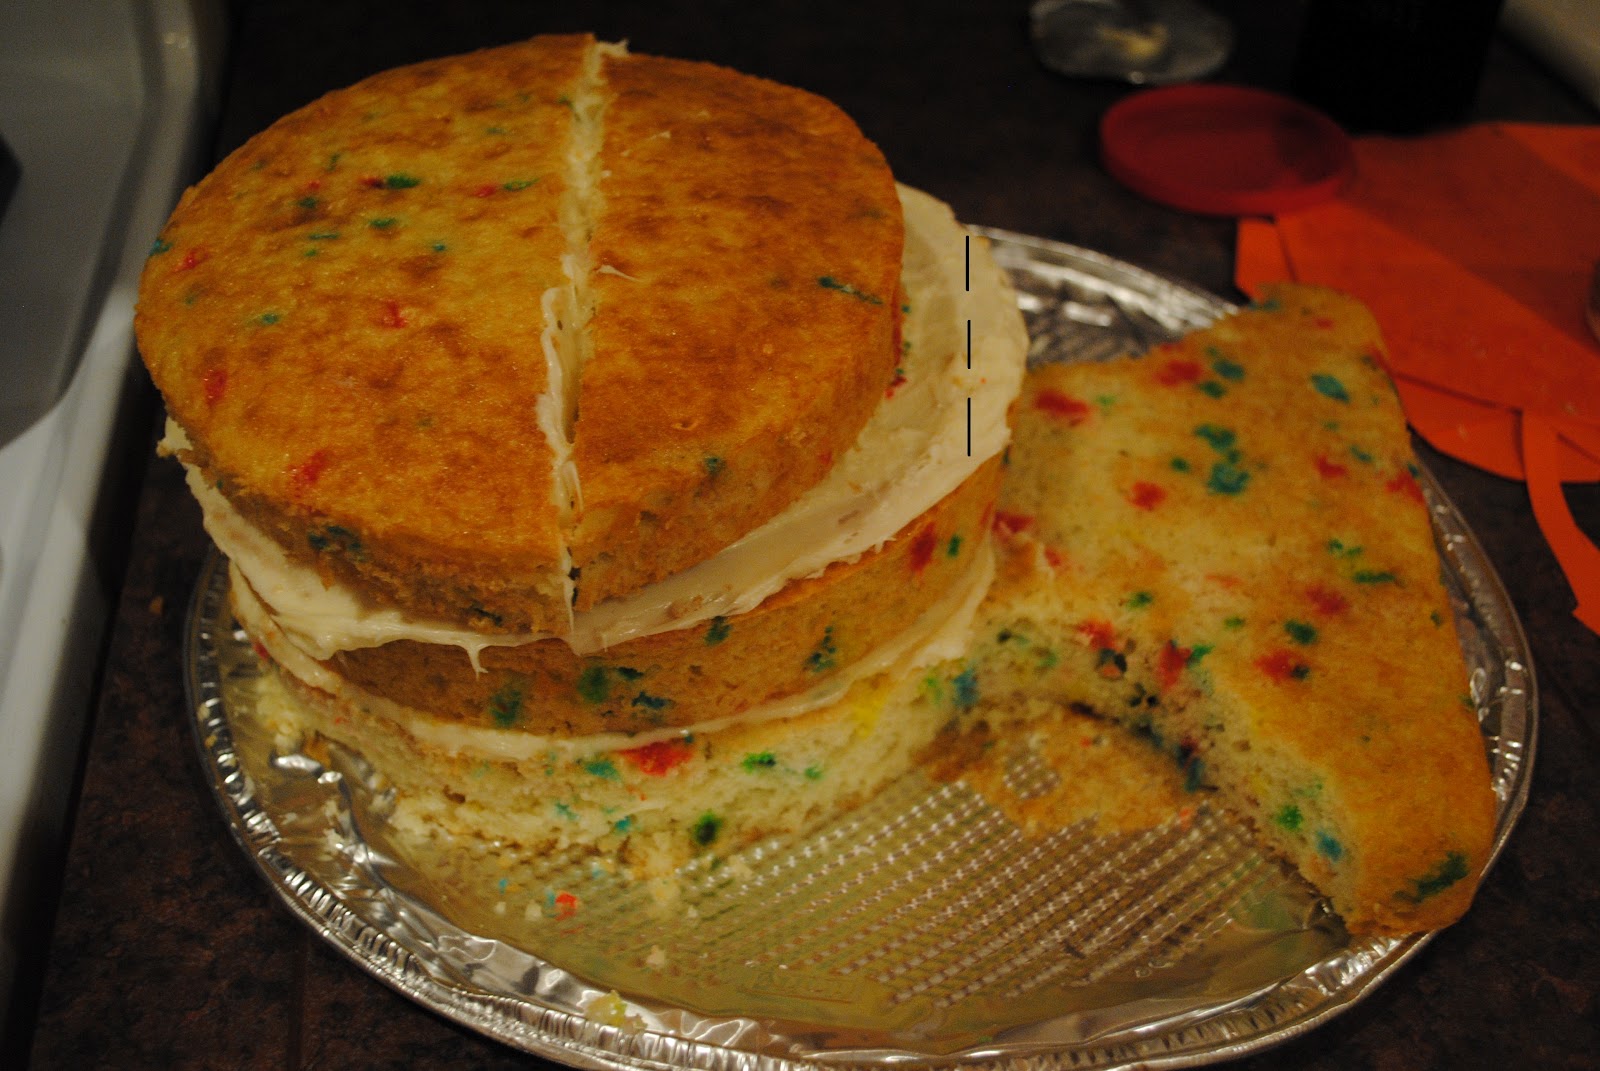
With your last round cake pan, cut the cake in half, and place one half on the front part of the "head" and frosting. I realize that this photo does not look like it is half of the pan because I took it at an angle, but trust me on this one! You will see below that it is half of layer #2.


With the remaining half, cut about 2/3 of it for the back part of the "head". The long sliver from the middle will be used for the tail later.

Add the smaller half circle to the back of the "head". I have also photoshopped a line where I trimmed off the back edge of layer #2 to stack to finish layer #3.
You will see below that the small edge has been "glued" to layer #3 with some more frosting. This is to help round out the shape of the head later.

I also cut a triangle from the back portion of the "tail" and inverted it onto the now straight-edge of layer #2, and "glued" with frosting.


Now, remember those leftover pieces we still have? We are going to use them to shape the tail. I have labeled them for your convenience.


And here is where they go on the back of the tail. Be sure to frost the bottom layer first, then place frosting between each piece as you "glue" them together.

Here is another view after I have fit them all together:

You have now finished the cake portion of the project! I popped him into the fridge to cool down, so that the pieces wouldn't slide around when they were frosted later. I would say a good hour is perfect.

Next, put the remaining frosting in a bowl, and using blue food coloring, add drops until you reach your desired color. I believe for both cans of frosting, I used about 30 drops for each.

Stir well to make sure there are no swirls!

Before you frost the cake, trim the layers vertically so that they are all even. These trimmings you can eat! You just want to shape the cake into a smooth shape.


Finally, using a smooth knife or spatula, spread a thin layer of frosting on the entire body. Don't worry if some cake pieces flake into the frosting, or you don't cover all the little spots. You will be using a thin layer of frosting 1-2 more times after the base coat.

Put the cake back into the fridge for about an hour so that the frosting can set. Repeat this step until you have a fairly smooth finish, and all spots are covered well. Remember to refrigerate in between layers. I actually left the initial frosting layer in overnight, and did the other two the next morning.
Then, I used black tubed icing to add some detail work. I added some lines to give the tail shape, and a smile to make him look cheery. The eyes are candied eyeballs that I used at Halloween here.


Lastly, add some blue twizzlers. I actually found these blue raspberry ones at Fresh Market. Just stick a few into the center of the head, and you now have yourself a whale! How cute is he?!


He also made a great centerpiece for our Under the Sea table. Good luck to anyone who tries to replicate this, and please let me know if you have any questions!!! You can e-mail me at foreverthehostess@gmail.com.


I hated to cut into him, but he was the most delicious Funfetti cake I have ever had! Remember, there are a few layers of frosting in between layers, so he was nice and moist, sweet and delicious!!! Thanks, Wally, for sprucing up our party!


Cream Cheese frosting is probably disgusting.
ReplyDeleteI Agree with "Anonymous", Cream Cheese frosting most likely tastes like Cream Cheese frosting, which is horrifying, by the way.
DeleteWhy on Earth would you leave a comment like that? It's rude, baseless, and doesn't add anything to the conversation. Who cares what flavor frosting you like? You should be embarrassed.
DeleteThanks to the hostess for taking the time to post such a detailed, helpful post. The cake looks great!
I LOVE cream cheese frosting!!!!!!!!!!!!
ReplyDeleteCream Cheese Frosting is weird. I think chocolate frosting would have been better.
ReplyDeleteI think this was a fantastic, well thought out, very detailed and very useful resource. Thank you for taking the time to create it!
ReplyDeleteThis is hilarious. Thanks for the inspiration. Hope you had a whale of a time.
ReplyDeleteI love cream cheese icing and appreciate this remarkably clever idea for a whale shaped cake. Your idea is going to make my grandson a very happy birthday cake (and rescue this grandmother's baking reputation.)
ReplyDelete