As October approaches, Breast Cancer Awareness has become a new mission for me. Having someone close to me be affected by the disease has really put things in perspective, and shows you that early detection and awareness can really change the outcome.
One in eight women will have breast cancer. That is a HUGE, shocking statistic. And recently, high profile women like NBC's Andrea Mitchell and comedienne Wanda Sykes have admitted that they have been treated for breast cancer. Unfortunately, this disease is different in every woman, and there is no definitive cause or cure. So with that, I ask of you two things:
Schedule a Mammogram: It is so important to get your first mammogram at a young age, so that you can have a baseline for every mammogram in the future. Make October the month you schedule yours.
Raise Awareness: Educate yourself on breast cancer, what to look for, what to ask your doctor. Pass the word to your mother, aunts, sisters, girlfriends, and make them do the same. And, donate to breast cancer research so that they find cures and we do not become part of the statistics. Here are some great sites to go to and pass along:
Also, I am walking in the Susan G. Komen Race For the Cure 5K this Saturday in honor of those close to me who have had to battle this terrible disease. If you would like to show your support, please click here to donate.
Since today is the first day of fall, I thought this would be the perfect time to share this recipe for Apple Honey bread. I had about a dozen apples leftover from our Back To School event, so I needed to make something with them quick! My friend and event chair for the event sent me an amazing recipe that she used for the apples she took home. Here is the adapted recipe from AllRecipes.com.
Ingredients:
1 cup sugar
1 cup vegetable oil
2 eggs
3/4 cup honey
1 tsp vanilla extract
2 1/2 cups all purpose flour
1 tsp baking powder
1 tsp baking soda
1 tsp salt
1 tsp ground cinnamon
1/4 tsp allspice
3 apples, peeled and shredded
3/4 cup pecans (the original recipe called for walnuts)
Preheat the oven to 375 degrees. The original recipe calls for a bundt pan, but I don't own a bundt pan, so I used a loaf pan and a mini muffin tin. Make sure your pans are greased, but I own these, so no greasing necessary!
Before mixing all the ingredients, you want to prep the apples. First, peel the apples:
Since I was working late at night (sorry for the dark photos!), I decided to use a knife to peel the apples quickly, but a good peeler will also work. I did not core the apples, because it actually made the next step easier- shredding the apples:
Holding onto the apple at the core by the top and bottom, run the apple along a cheese grater. I actually used the larger hole side, turning the apple as I grated, so that the whole apple is grated in about a minute. Repeat with the other 2 apples. As you can see from the shredding, the apples start to turn brown quickly, so you know they are ripe and ready to bake!
In a large bowl or mixer, combine the sugar and oil. Beat in the eggs, and then vanilla and honey. Combine the flour, baking powder, baking soda, salt, cinnamon and allspice in a separate bowl, and stir mixture into the batter. Once all the ingredients are mixed, with a spoon, stir in the apples and pecans as to not crush them. Fill the loaf pan first, it should be about 1/3 of the total mixture. The fill the mini muffin tin. You should be able to get about 30 mini muffins and one bread loaf from the entire mixture.
When using the mini muffin pan, I found that about 15-20 minutes is the perfect baking time. For the loaf pan, I found that 45-50 minutes was the perfect baking time. To check, place a toothpick into the center and if it comes out clean, the bread is done!
This recipe is so delicious that the bread is already gone - we took it to a family dinner and served it with vanilla ice cream. The mini muffins are perfect for breakfast, and those will be finished up this weekend!I think next time, I will put a cream cheese frosting on the bread and maybe drizzle with a little caramel or honey. Definitely a quick and easy recipe to welcome fall!
Check back next week for my Grandmother's apple pie recipe, in which I hope to use up the remaining apples!
About a month ago, I was at a garage sale and came across a vintage lamp for $0.50. If you ask my husband, I am like a moth to a flame when it comes to lamps. We currently have 6 lamps in 3 rooms, but I actually had 5 more in the house before the home and condo renovations. So I purchased this vintage arm lamp for two whole quarters, and brought it home to live in our sun room.
It is the perfect reading lamp, but I felt like it needed a shade. After several failed trips to local hardware and lighting stores to find a shade that looks vintage and fits, I had just about given up on making it look less tacky with just a bulb. Enter the 700+ page of Restoration Hardware's newest catalog. I sat down for a whole hour scouring the pages, when what comes along? This:
These bulbs are so beautiful, and I thought, why not buy a vintage style bulb for a vintage lamp, and leave it exposed?! I had to wait a whole two weeks with this idea until I could get to our local Restoration Hardware with my husband. I made the sales associate pull out all the bulbs she had from the back so that we could plug them all into a lamp and check them out. I think my husband was a little skeptical at first, but once we saw them in person, he was on board! They really are amazing and beautiful, and one of our favorites was the Radio bulb (fourth from left above). The color of the glass is almost amber, and the filament is so cool when it is on. However, it only comes in a 30 watt bulb, and it just wasn't enough light to make ours a reading lamp.
We ended up deciding on the 40 watt Edison 1910 squirrel cage bulb, and since they are having a lighting sale, we got it for $13. Of course, that seems like a lot for one light bulb, but I have to say that it definitely adds the bit of drama to the light without making it look fussy or too modern. And considering the pieces I had previously found to retrofit a shade on the lamp, it would have cost me twice that much. I still think that a lamp for a total of $13.50 is a great deal!
When it comes to vintage pieces, sometimes less is more.
PS- This weekend, once my camera battery is charged, I will take a photo of the lamp and the new light bulb, just to prove how they were meant to be together. Update, here are some photos:
This past Saturday was the St. Petersburg Museum of History'sBack To School event. We invited history teachers from around the county to show them the great exhibits, archives, and initiatives that can be used for and in their classrooms.
I had a ton of fun working on this event, and coming up with some cute school-themed tablescapes and details. Lets have a look:
Here is the Flight Gallery, in which we have a model of Tony Jannus's plane the Benoist, is where we hosted the event. Forgive the standard chairs, we were going for a casual look!
For the tablescapes, we used the caterer's black linens as the base, and I purchased the brown paper in a giant roll at Lowes for $10. I made bowls out of black yarn and glue. We filled them with real red apples, tied on some red gingham ribbons, and then used the red chiffon squares from my wedding underneath. My event chair added her own creative touch with the foam alphabet letters she bought at Michaels. The chalkboards I purchased at Joanns for $1.50 each and we reused some small vases I had at home (originally from the dollar store) to hold the crayons that guests could use to draw on the tables.
Here is a closer look at the apples and baskets I made:
And just to get guests thinking and drawing, we added a few little drawings of our own to the tables. I love how the white crayon looks on the brown paper!
The Museum is always in need of research materials for the Archivists, as well as volunteers. I used some more of the chalkboards to let guests know how they can help!
We created pledge cards, on which guests could pledge an item or a dollar figure towards an item. I found a photo of a yellow index card online, and used it for the background of my pledge cards. I popped it into a quarter page postcard layout on Microsoft Publisher, and used the Typewriterhand font to create the cards. I think they turned out so cute!
The guests can then drop them into boxes that we had at a few locations around the museum. I took a USPS box and covered it with red gingham fabric from Joanns. I then glued a school themed name plaque to the front of each one to let people know they can use them for donations and pledge cards.
We presented our Museum In A Box project, which allows teachers in 4th and 5th grades to borrow a box of artifacts, interactive media, lesson plans, and more from the museum to teach in their classrooms. The areas of history are Native Americas, Transportation, and Sports & Recreation.
Our Native American Museum in a Box was presented by the very lively expert Hermann Trappman. Our guests raved about him!
Our Transportation Museum in a Box was presented by Jeff Danner, a local transportation expert and City Council Member.
And our last Museum In A Box was presented by Dennis Schrader, who has an obsession for baseball history, and owns the largest collection of signed baseballs on the planet. Luckily for us, an article in the newspaper about him came out that morning, and he brought the case of signed balls featured in the article!
The evening was not complete without the delicious food from Delectables,
and our guests seemed to like eating on styrofoam lunch trays we provided to go with our school theme.
And last but not least, the AMAZING performance from the Nate Najar Trio.
Overall, I think it turned out to be a great event! Stay tuned to see what I do with all the apples we used at the tables.... apple recipes coming up!
This Saturday is the Back To School event I have been working hard on at the St. Petersburg Museum of History. For all you teachers out there, this is going to be a great event to show you all the wonderful teaching opportunities the museum has for you and your classroom. And don't forget about the fabulous food, wine, and entertainment we have too! RSVP here! Stay tuned next week for all the details!
This Saturday night, at the St. Petersburg Museum of History, I am helping put together our Back To School event. More to come about that later in the week.... but just wanted to share with you my very talented and accomplished friend, Nate Najar, who will be adding his jazz music to our evening. Nate and I went to high school together, and I have followed him and his music for years since then. Be sure to check out his talents, and come to our event this weekend to see him in person!
This past Saturday, we had a family adventure planned... a trip 30 minutes north to a little Greek town called Tarpon Springs, Florida. Tarpon Springs has the highest population of Greeks of any city in the United States, and between their traditional restaurants, annual Epiphany celebration, local shops, and remnants of the old sponging industry, this little town is a must-see.
When we arrived to the docks, we were greeted by this little sponge diver, and a sign that Mike Rowe of Dirty Jobs had already been there. Be sure to check out his experience here harvesting sponges from the waters of the Gulf of Mexico.We walked through an old museum that told about the sponging industry, and how the Greek population came to Tarpon Springs. Then we headed down to the docks!
The St. Nicholas III, a typical sponge boat at the docks that can be rented for day tours and simulations of what it would be like to go "sponging" on the Gulf of Mexico. We were a little more interested in the food, which brought us to the famous Hellas Bakery.
While it looks a little like a nightclub on the outside, this bakery and restaurant actually make some of the best Greek pastries and treats you may ever have in your life.
Since we arrived mid-morning, we grabbed a quick bite of one of my favorite Greek dishes, Tiropita, a feta cheese pie made with layers of buttered phyllo dough. Here is my brother-in-law and sister-in-law with their tiropita and Greek coffee.
Since I am not much of a morning person, I also grabbed a Greek coffee. It was the smallest cup (especially for $2.25), but it was like a triple espresso from Starbucks. It certainly got me through the rest of my day!
As we walked a little off the beaten path, we found a grocery store where my sister-in-law and I bought Orzo to make some traditional Greek dishes at home. We also saw this nightclub, Zorbas, which instantly reminded me of the restaurant, "Dancing Zorbas", in the film My Big Fat Greek Wedding.
The city makes a lot of its money from tourists and their demand for sponges. Sponges are sold at every shop, and in a million different sizes and shapes, and prices! Most were too expensive, and none of us bought any while we were there, but I did take some pictures of some beautiful ones.
To wrap up our half day excursion, we ate lunch at the famous Mykonos restaurant. Most of us ordered the Gyro, but we also tried the Horiatiki salad, and traditional lemon soup.
We were all so obsessed with the Horiatiki salad (it is basically what we know as a Greek Salad, but without the lettuce and potato salad), that I stopped on my way home at the local produce market to get all the ingredients. We also purchased Andrico's Greek dressing from the restaurant to use on the salad. Here's my recipe:
Traditional Horiatiki
Red ripe tomatoes
Green tomatoes
Cucumber
White/Yellow onion
Green pepper
Pepperoncini (I left this out of mine, since I don't really like them)
Kalamata olives
Fresh Feta Cheese
1 Tbsp Andrico's Greek Dressing
Pita Bread (optional)
Chop up all the veggies and olives into bite sized pieces and combine in a bowl. Drizzle on the Greek dressing, and then toss the veggies in it until all are well covered. In a separate bowl, place a large hunk of feta on the bottom, and add the veggies and olives on top. Serve with pita bread to sop up the remaining dressing at the bottom of the bowl when you finish the salad.
After lunch, we stopped back by the Hellas Bakery to get a few confections to go. I bought some tiropita, baklava, and almond cookies. They only lasted a day in my house!
So that was our little excursion to Tarpon Springs. Stay tuned, as I now have a serious craving for more Greek food, and will share my own recipe for tiropita, as well as a few new things to try. If you are ever in the area, be sure to check out this little gem and all it has to offer!
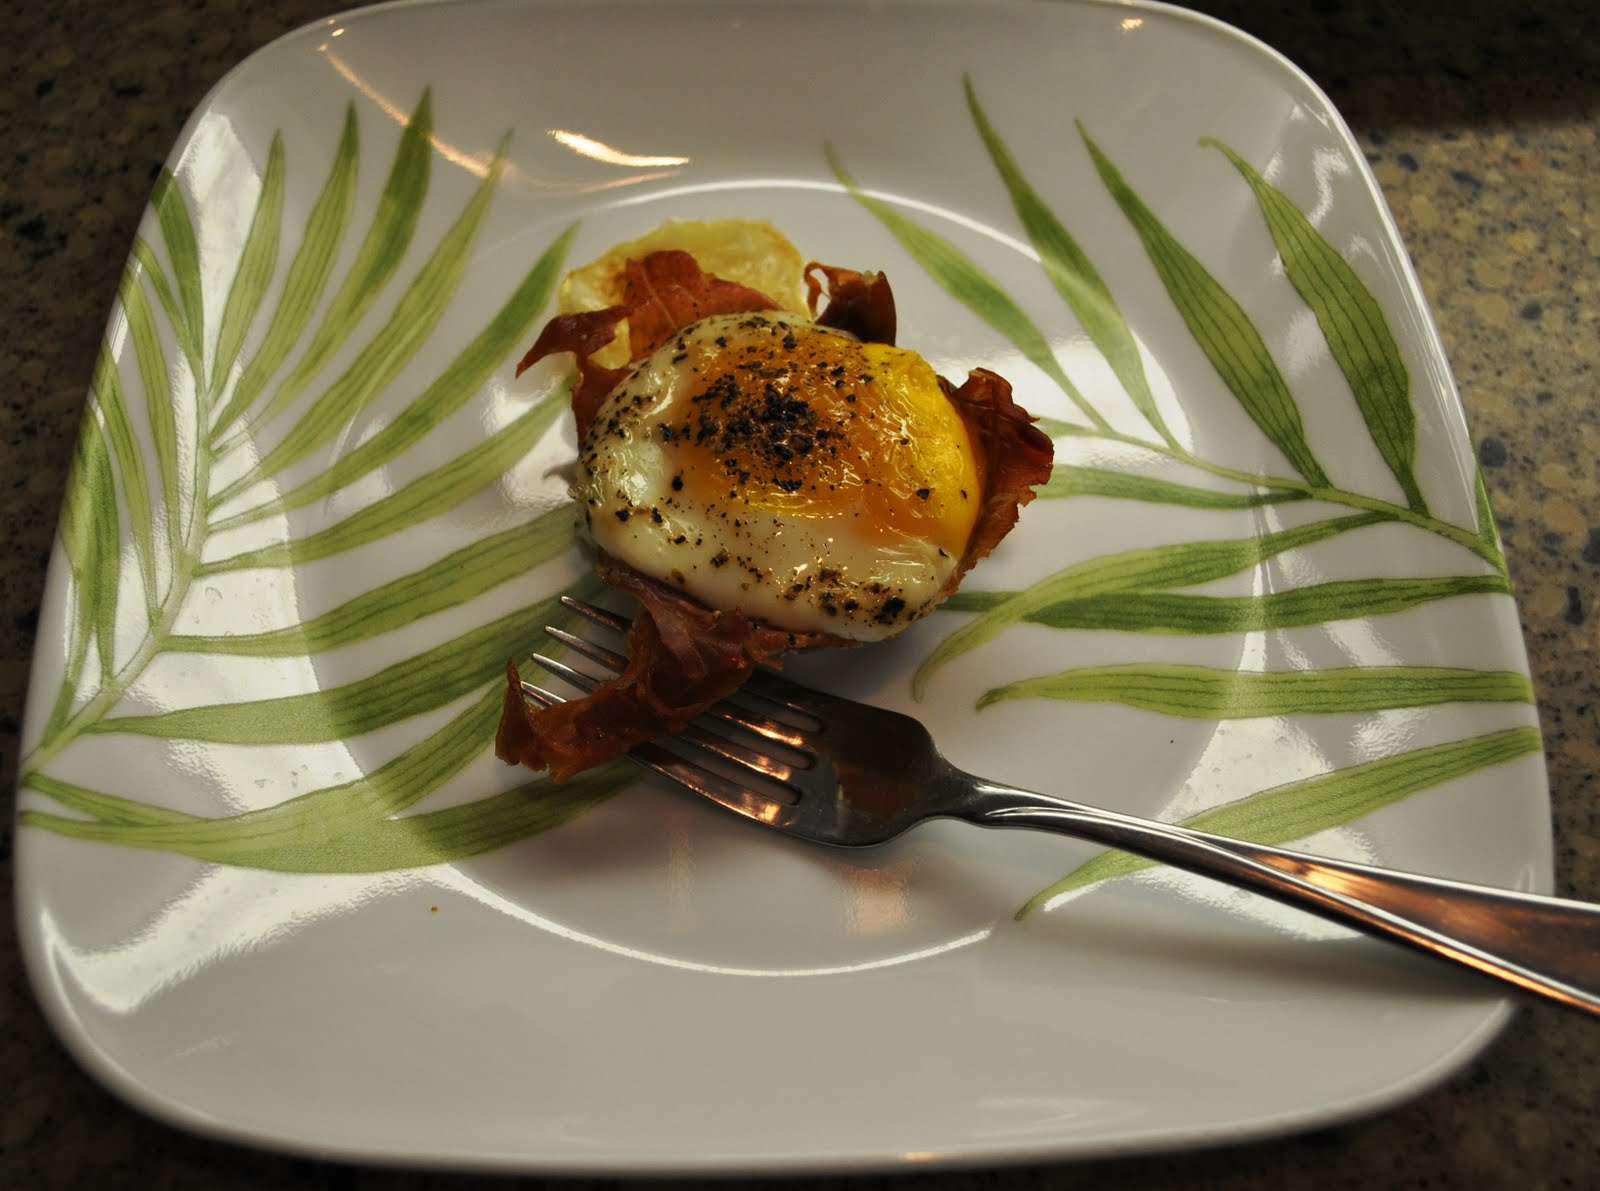
While browsing through my Everyday with Rachel Ray Magazine, I found the fastest and easiest way to make poached eggs. I simplified Rachel's recipe (no basil or cheese)and tried it this past weekend, and have made it three times since. Now why didn't I think of this?
Ingredients:
Eggs (I use the organic Egglands Best, for health reasons)
Thin sliced Prosciutto
Cracked Black Pepper
Non-stick Muffin Tin
Set oven to bake at 375 degrees. In a non-stick muffin tin, place thin slices of prosciutto in each cup, and be sure to cover all of the inside of the cup. I actually cut each slice in half, and then used two halves to cover the whole cup. Repeat for each number of cups you want to make. Next, crack one egg into each cup, and add a little cracked pepper to the top. No salt is needed, due to the saltiness of the prosciutto. Bake entire pan for 15 minutes, and let rest for a few minutes before serving.
Each cup should easily come out with a spoon and onto your plate, and the prosciutto will be perfectly crispy and the eggs perfectly poached.
Next time, I will use this recipe for bridal/baby showers, and will simply put this cup onto an english muffin and top with hollandaise sauce and fresh parsley for a quick Eggs Benedict!
Every year when my family goes down to Captiva Island for Labor Day, I end up making a red velvet cake to take down there with us. We always have more than enough food and desserts, so I don't feel too bad if it is not perfect, or if it tips over in the car. The homemade ones are the best, but we can always buy one down the road for a pretty penny if it really gets ruined. This year, we came close to having to do just that....
Hostess Tip #7: Don't trust an oven you've never used before. And...
Hostess Tip #8: Don't go lay out by the pool while you are making a red velvet cake in an oven you have never used before.
This year, I decided to bring all the ingredients and make it fresh at the house where we were staying. I prepared the cake as normal, and was excited to use an oven that easily held all three pans on the same rack. I set my cell phone alarm for 10 minutes before the 3 cake rounds were supposed to be done, but as I stepped foot into the house to check on them, I smelled burning cake. Frankly, I am amazed the smoke alarm didn't go off! They had baked unevenly, and overflowed onto the elements on the bottom of the oven, which may or may not have been the reason the breaker tripped and it took us a few hours the next day to determine why the oven and stove weren't working. Needless to say, it took me 20 minutes to clean the hot oven, and a few hours to air out the house. I ended up using the three cakes, by shaving them down to even layers, and icing them, however, it ended up being the UGLIEST cake I have ever made in my life. I didn't even take a picture, it was so bad. However, I'm pretty sure it was one of the best red velvet cakes I have ever made, and it was gone by the second night of our long weekend.
Note to self: Make it ahead of time in your own oven, when you know it cooks perfectly every time.
Until the Missoni for Target line is in stores. FINALLY, there is a collaboration that is swoon worthy, between the women's wear and the home decor, I am loving all Missoni brought to the table... literally! Check out some of my favorites:
All images are courtesy of the Fashionista. For the entire lookbook, check out their website, or the Target preview here.

 Pink Ribbon