This morning, I invited my goddaughter Kinsley and her mom Amy over, as well as our friends Katie and her daughter Bree, and Janet and her baby Max for some good old-fashioned pumpkin carving! In Florida, with the humidity, pumpkins tend to rot quickly, so I always wait until a few days before Halloween to cave them.
Since it was raining outside, I decided to use my kitchen floor as our workspace (which is where I usually carve a pumpkin by myself anyway). I first laid down some newspapers to protect the floor, and then some dollar store Halloween plastic tablecloths. I put out two bowls, one for the guts without seeds, and one for the guts with seeds that we can separate, as well as my tools.
This year, I found some tools at Michaels that worked amazingly well. The 4 in 1 knife (far left) and the pumpkin scooper (second from left). Then I had an apple corer and spoon and knife. Both tools were on sale, and were less flimsy than I has originally thought. This pumpkin scooper actually allowed me to get all the guts out of my pumpkin in 5 minutes flat - AMAZING! The spoon and knife are my usual go to tools, since I have used them for years to carve pumpkins. Use whatever works best for you.
For snacks, since I was catering to 3 year olds, I made peanut butter and blackberry jam sandwiches and cut them into pumpkin shapes with a cookie cutter. Raisins too, of course, since all 3 year olds love raisins.
And something my mom used to make for us every Halloween: Blood and Bones. Its really healthy microwave popcorn with Smart Balance butter, melted and colored with red food coloring poured over it.
I found the cutest things at Target... spider shaped silicone cupcake molds. You simply make the cake mix, pour in the mold, and bake as usual. Then top with icing and googly eye sugar candies and black glitter gel icing, and you have yourself some spider cupcakes. I also made ghosts from an old Halloween silicone baking pan I had with the leftover cake mix. They came out pretty darn cute, and yummy too!
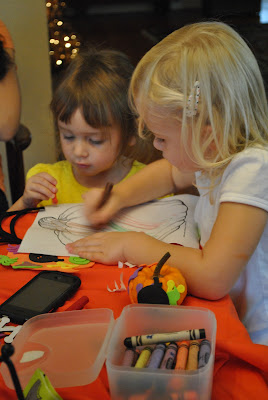
Here is my dining room, where the girls had Halloween crafts to work on while the moms used the sharp knives, as previously seen here.
Since we had to keep them occupied, I went to Michaels and found some really cute foam pumpkins and a whole box of peel and stick Halloween shapes and letters for them to decorate.
My mother, the old kindergarten teacher, also gave me a box of big crayons and some black and white photocopies of pumpkins that they could draw on as well.
The girls got right to work on their decorations, as Janet and baby Max supervised. How cute is he in his Curious George Halloween onesie?!
Here's Bree after checking in on mom Katie carving their pumpkin.
Katie used one of the templates from the pumpkin carving book that comes with the set of mini tools. Their ghostly pumpkin came out amazing!!!
Kinsley and mom Amy had two large pumpkins to carve (I actually carved the one on the left, per Miss Kinsley's instructions), and they turned out great! One is a happy pumpkin and the other is a bit scary... a perfect combination!
And here are Amy and Kinsley with all their pumpkins. You can see Kinsley got to work and put lots of sticky foam shapes on the smaller two. I think we're all now ready for Halloween!
Hours after they left, I finally go around to carving my own pumpkin. I made her a witch (notice the mole on her nose, and spaced out gagly teeth?!). She will have a hat tonight too.
Here she glows:
Notice the ears. I give all my pumpkins ears every year. I just like that something on the sides of the pumpkins glow too!
Now I'm ready for Halloween! Did you carve your pumpkin yet?


No comments:
Post a Comment