As you may remember, we visited Tarpon Springs back in September. When we ate lunch at Mykonos restaurant, we tried their Lemon Chicken Soup, which in Greek is called Avgolemono. I could not stop thinking about how good this soup would be for the early, crisp days of fall. Lemony goodness from the end of summer, mixed with a thick hearty broth that reminds you of the good fall soups. I just had to make it. And since my sister-in-law and I bought some orzo at the Greek market, it was just the thing to get me going.
After searching many recipes online and in my vintage Greek cookbook, I kind of blended recipes to make what I wanted. Here it is:
Ingredients:
8 cups Chicken Broth
1/2 cup Fresh Lemon juice, plus two lemons sliced
1/2 cup chopped onion
1/2 can of chicken soup base (I actually used the broth from a can of chicken noodle soup I had in my pantry)
1/4 cup of butter or margarine (I used Smart Balance)
1/4 cup all purpose flour (or Wondra)
2 cups Orzo*, cooked (you can also use rice, but it is MUCH better with orzo)
8 egg yolks
1 tsp white pepper
4 chicken breasts, boiled and shredded**
Optional: 1/2 cup carrots and celery - I just don't like these in my soup!
*Bring a pot of water to a boil and add two cups of Orzo, and cook per the instructions on the package. Do not overcook the orzo, as it may cook a little once you add it back into the soup base. Drain, as instructed, and set aside until the soup base is complete.
**If you haven't made it yet, bring a pot of water to a boil and add your pieces of chicken breast. Boil on high for 10-15 minutes, or until fully cooked. On a cutting board, remove the chicken pieces and shred. Set aside until the soup base is complete.
First, combine the chicken broth, lemon juice, onions (and carrots & celery if you choose), chicken soup base, and pepper in a large saucepan and bring to a boil. Once it is boiling, reduce the heat to low or simmer for about 20 minutes.
Next, blend the butter and flour together and gradually add the paste mixture to the soup, and stir in with a whisk. Simmer for another 10 minutes.
While that is cooking, beat the egg yolks in a bowl until they get lighter in color. With a ladle, remove some of the soup mixture, and whisk it into the egg yolks. Once you get it fully mixed, combine the egg yolks into the soup base, and cook for another 5-10 minutes. Be sure to whisk in the yolks so that they are fully combined and cooked.
Once you have done that, add in the orzo and chicken that you cooked earlier, and let simmer for 3-5 minutes, or until the chicken is warm again. Ladle into bowls and top with fresh chopped Greek parsley, and serve.
This was so good that it may just become my staple for Chicken Soup when I am sick! A great way to combine the summer and fall flavors, all in one dish. Hope you enjoy!
Friday, October 14, 2011
Monday, October 10, 2011
Halloween Decor
Halloween is one of my most favorite holidays. Don't get me wrong, I cry after Christmas decorations are taken down, but Halloween decor is just a little more fun. I had to scale it back since our home is on the market, but I still put out some of my favorites. Take a look:
In the dining room, I used the orange material from our UF Football parties as the tablecloth. I then added the spider runners to both the table and buffet. They are from Pier 1 and I bought them last year on clearance for $5 each.The spider candle holder in the middle I found at Ross for $5 this year, and the orange glitter candles I found at Michael's, and bought with a 40% off coupon.
The back BOO wooden sign, black wrought iron candlesticks, and the spooky candle tree were all hand me downs from my mother's vast Halloween decor collection.
In my front living room, I have more of a harvest feel, since I leave most of these decorations up through Thanksgiving in November.
My favorite decorations are the light up pumpkin and gourd I bought years ago at Pier 1. You can sometimes find them around Halloween, but each store usually only gets one or two. My mother loved mine so much, she bought the same two for her house! They are just cheery and whimsical, and get me ready for Christmas lights!
This sign is a little country for me, but I found it at HomeGoods and it pretty sums up how I feel about Halloween. It should be fun and a little spooky at the same time. I think I paid about $7 for the sign, and I bought the garland for the mantle there as well, for about $10 or less.
Halloween decor does not have to cost a fortune! Just check out the mummy project from last year. Simple elements cane keep things cheap and cute! What are some of your favorite decorations for Halloween?
In the dining room, I used the orange material from our UF Football parties as the tablecloth. I then added the spider runners to both the table and buffet. They are from Pier 1 and I bought them last year on clearance for $5 each.The spider candle holder in the middle I found at Ross for $5 this year, and the orange glitter candles I found at Michael's, and bought with a 40% off coupon.
The back BOO wooden sign, black wrought iron candlesticks, and the spooky candle tree were all hand me downs from my mother's vast Halloween decor collection.
In my front living room, I have more of a harvest feel, since I leave most of these decorations up through Thanksgiving in November.
My favorite decorations are the light up pumpkin and gourd I bought years ago at Pier 1. You can sometimes find them around Halloween, but each store usually only gets one or two. My mother loved mine so much, she bought the same two for her house! They are just cheery and whimsical, and get me ready for Christmas lights!
This sign is a little country for me, but I found it at HomeGoods and it pretty sums up how I feel about Halloween. It should be fun and a little spooky at the same time. I think I paid about $7 for the sign, and I bought the garland for the mantle there as well, for about $10 or less.
Halloween decor does not have to cost a fortune! Just check out the mummy project from last year. Simple elements cane keep things cheap and cute! What are some of your favorite decorations for Halloween?
Saturday, October 8, 2011
Obsession: Pumpkin Quick Bread
This time of year, I make something every two weeks that literally only lasts us about 2 days: Williams Sonoma's Spiced Pecan Pumpkin Spice Quick Bread mix. I seriously stockpile these so I can make them throughout the entire fall, and the aroma that fills your house when you bake it is just heavenly!
I sometimes add cream cheese frosting to the top if I am going to serve it to guests, but my husband and I actually prefer it plain or with a little melted butter. So yummy!
I would have taken a photo of our bread, but like I said, it didn't last long! And this post is not sponsored, nor was I paid anything by WS to talk about their bread. I just seriously am obsessed!
I sometimes add cream cheese frosting to the top if I am going to serve it to guests, but my husband and I actually prefer it plain or with a little melted butter. So yummy!
I would have taken a photo of our bread, but like I said, it didn't last long! And this post is not sponsored, nor was I paid anything by WS to talk about their bread. I just seriously am obsessed!
Wednesday, October 5, 2011
Use What You've Got: Rustic Pasta
There are some weeks when I am scrappy in the kitchen. I look at what ingredients we have, and come up with something delicious to eat. Some days, the food is an epic failure, and usually I know it was not good when my husband has dessert or some cottage cheese after dinner. Last night, though, I really loved the flavor of what I made and will be altering this in the future, depending on what ingredients we have in the house.
Ingredients:
Pasta (I used Whole wheat angel hair)
Garlic, miced
Fresh Tomatoes, diced
Lemon Juice
Olive Oil
Meat, diced (I used bacon, but any salami or sausage will do)
Italian spices
Optional: Splash of White Wine, Porcini mushrooms, grated Parmesan
I first heated about 1 Tbsp of olive oil and garlic in a deep skillet over medium heat. Next, I drained a little of the oil, and added diced bacon. I tried to keep the really fatty pieces out, so in total what you see is about four or five pieces of bacon. Turn the bacon pieces until they are browned.
While the bacon is cooking, dice two medium sized tomatoes. I also left out some of the seeds, as I wanted the tomatoes to stay chunky and not watery.
Once the bacon is browned, add the tomatoes and toss.
Next, add whatever other ingredients you have lying around. I had dried Porcini mushrooms, so I added those, as well as some Italian seasoning.
Next add about 4-5 Tbsp of lemon juice and a splash of white wine, and be sure to stir so that all the ingredients blend together. Simmer on medium-low so that the flavors can infuse into the lemon juice and wine.
While it is simmering, boil a pot of water and add your pasta. I like whole wheat angel hair, but again, whatever you have in your house. Forgive the little floating green pieces in the water... I got excited with the parsley!
Here's a little trick... undercook the pasta by a minute or two. I love al dente pasta, but I even undercooked this by two minutes, so that I could add it to the sauce mixture to cook for additional time.
Once your sauce cooks down into a thicker sauce, turn the burner off or on low.
Drain your undercooked pasta, and add it to the skillet.
Toss well and allow the pasta to sit in the sauce for another couple of minutes to soak up the juices and flavors.
Serve with a little grated Parmesan cheese and enjoy! I really loved this disk because the bacon (or any kind of meat) with the lemon juice, wine, and tomatoes really gave it that rustic Italian flavoring. The Porcini mushrooms also added a hint of richness to the dish. Definitely a great, easy dish for a cool fall night, and I can't wait to try other variations with different ingredients!
Ingredients:
Pasta (I used Whole wheat angel hair)
Garlic, miced
Fresh Tomatoes, diced
Lemon Juice
Olive Oil
Meat, diced (I used bacon, but any salami or sausage will do)
Italian spices
Optional: Splash of White Wine, Porcini mushrooms, grated Parmesan
I first heated about 1 Tbsp of olive oil and garlic in a deep skillet over medium heat. Next, I drained a little of the oil, and added diced bacon. I tried to keep the really fatty pieces out, so in total what you see is about four or five pieces of bacon. Turn the bacon pieces until they are browned.
While the bacon is cooking, dice two medium sized tomatoes. I also left out some of the seeds, as I wanted the tomatoes to stay chunky and not watery.
Once the bacon is browned, add the tomatoes and toss.
Next, add whatever other ingredients you have lying around. I had dried Porcini mushrooms, so I added those, as well as some Italian seasoning.
Next add about 4-5 Tbsp of lemon juice and a splash of white wine, and be sure to stir so that all the ingredients blend together. Simmer on medium-low so that the flavors can infuse into the lemon juice and wine.
While it is simmering, boil a pot of water and add your pasta. I like whole wheat angel hair, but again, whatever you have in your house. Forgive the little floating green pieces in the water... I got excited with the parsley!
Here's a little trick... undercook the pasta by a minute or two. I love al dente pasta, but I even undercooked this by two minutes, so that I could add it to the sauce mixture to cook for additional time.
Once your sauce cooks down into a thicker sauce, turn the burner off or on low.
Drain your undercooked pasta, and add it to the skillet.
Toss well and allow the pasta to sit in the sauce for another couple of minutes to soak up the juices and flavors.
Serve with a little grated Parmesan cheese and enjoy! I really loved this disk because the bacon (or any kind of meat) with the lemon juice, wine, and tomatoes really gave it that rustic Italian flavoring. The Porcini mushrooms also added a hint of richness to the dish. Definitely a great, easy dish for a cool fall night, and I can't wait to try other variations with different ingredients!
Monday, October 3, 2011
Pulled Pork Flautas
Over the weekend, we had people over for the Gator Football Game, and I made pulled pork, similar to this recipe here, using the Backyard BBQ Spice Blend from Savory Spice Shop. Since I had guests add the BBQ sauce to the pork as they made their sandwiches, the leftover pork could be altered for other recipes. I decided to make Pulled Pork Flautas, and while I order them regularly at a local restaurant, I have actually never made them until now. Here's what you need:
Ingredients:
Pulled Pork (it doesn't have to be leftovers!)
Spices
White/Mexican cheese, grated
Tortillas (I prefer whole wheat)
Toothpicks
Couple Tbsp of oil, olive or vegetable
Optional: Sour Cream, Guacamole, Fruit preserves
First, I microwaved the pork so that it would be warm.
Next, I grated some Mexican cheese. Cojita or any kind of white soft cheese works best.
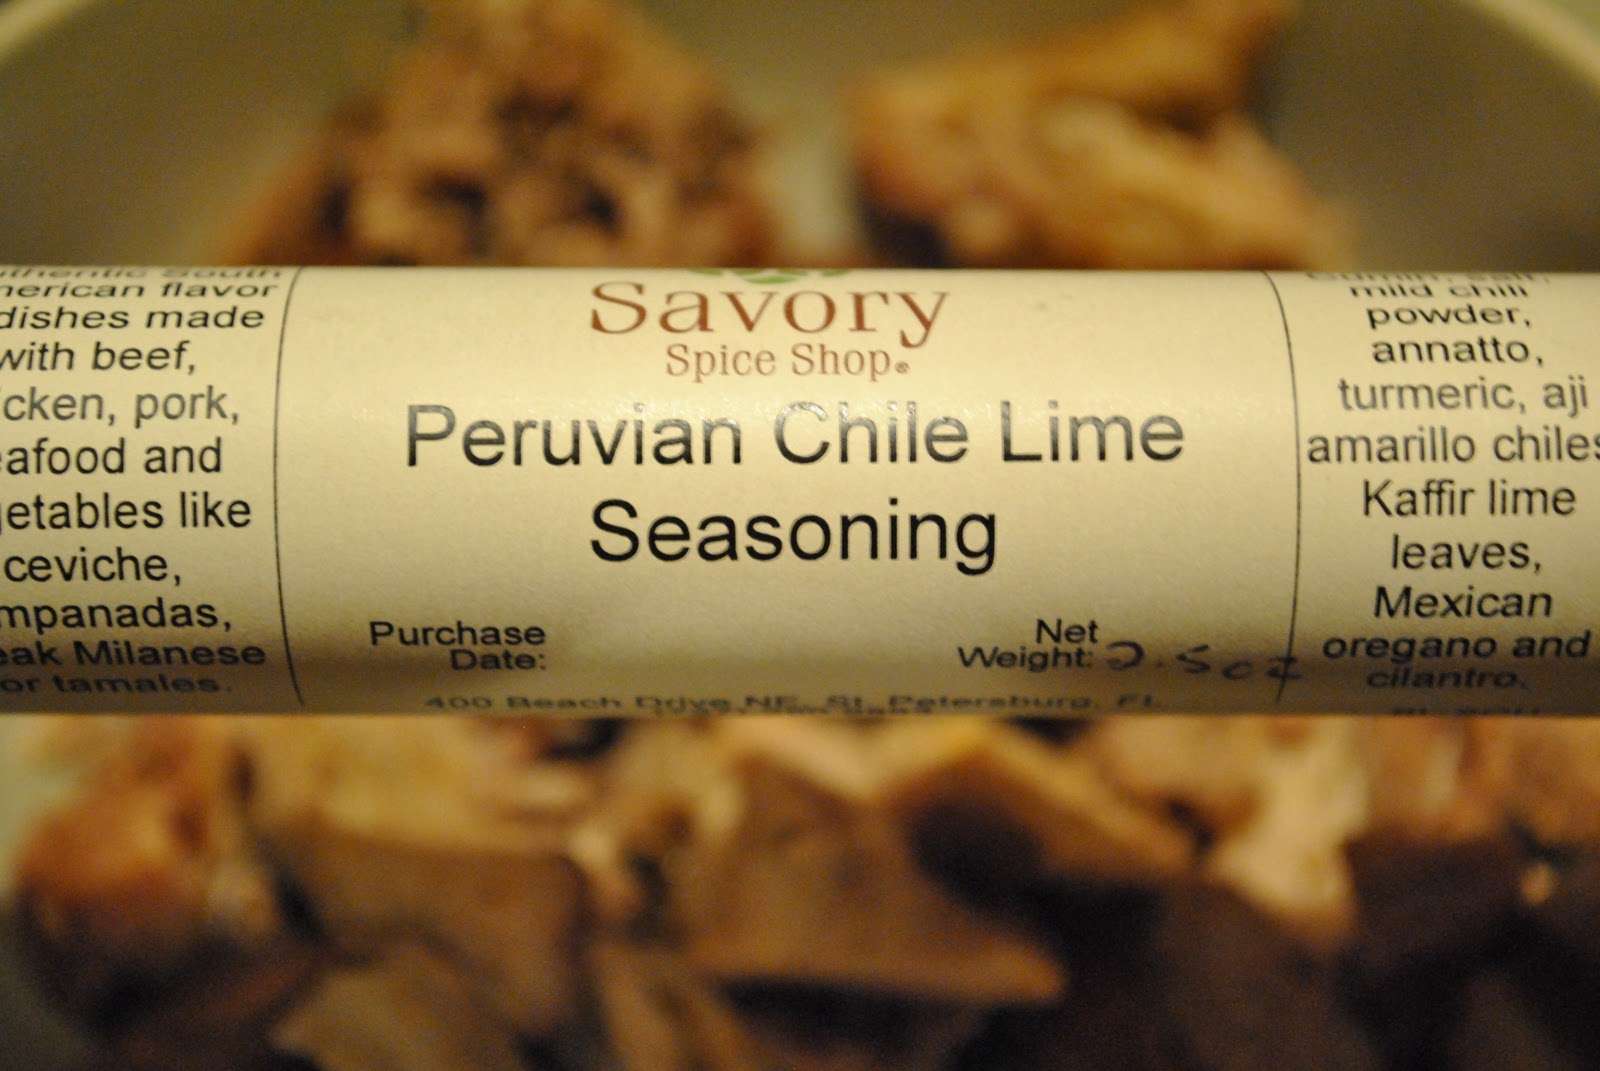
In order to make it have a little more Mexican flare, I added a bit of the Peruvian Chile Lime Seasoning from Savory for a little heat. Mix the spice well into the pork so that you cover every piece.
In a deep skillet, heat a little oil (I used olive oil, but vegetable oil works too), enough to cover the bottom, over medium heat.
Next, take a flour tortilla and place it on a plate. Toward one side of the tortilla, place about two spoonfuls of pork and a little cheese on top. You don't want to make the tortilla too full, because you have to make sure you can roll it up all the way.
Fold your tortilla on two sides, and then roll. Use one toothpick, broken in half, to secure the flap.
It is difficult to cook with oil while holding a camera, so I have no photos of what to do next. Place your flautas into the oil and continue to turn them until all sides are brown. Remove from oil and drain on a paper towel before serving.
I served our pork flautas with guacamole, sour cream, and blackberry preserves. I have to tell you that while I love pork and guacamole together, the blackberry adds a little sweetness to the salty and spicy pork, and it was AMAZING! I dare you to try!
These were so good, that I may just make pulled pork for flautas instead of sandwiches! Even my husband gave me kudos for turning leftovers into something so yummy and new! Hope you enjoy!
Ingredients:
Pulled Pork (it doesn't have to be leftovers!)
Spices
White/Mexican cheese, grated
Tortillas (I prefer whole wheat)
Toothpicks
Couple Tbsp of oil, olive or vegetable
Optional: Sour Cream, Guacamole, Fruit preserves
First, I microwaved the pork so that it would be warm.
Next, I grated some Mexican cheese. Cojita or any kind of white soft cheese works best.
In order to make it have a little more Mexican flare, I added a bit of the Peruvian Chile Lime Seasoning from Savory for a little heat. Mix the spice well into the pork so that you cover every piece.
In a deep skillet, heat a little oil (I used olive oil, but vegetable oil works too), enough to cover the bottom, over medium heat.
Next, take a flour tortilla and place it on a plate. Toward one side of the tortilla, place about two spoonfuls of pork and a little cheese on top. You don't want to make the tortilla too full, because you have to make sure you can roll it up all the way.
Fold your tortilla on two sides, and then roll. Use one toothpick, broken in half, to secure the flap.
It is difficult to cook with oil while holding a camera, so I have no photos of what to do next. Place your flautas into the oil and continue to turn them until all sides are brown. Remove from oil and drain on a paper towel before serving.
I served our pork flautas with guacamole, sour cream, and blackberry preserves. I have to tell you that while I love pork and guacamole together, the blackberry adds a little sweetness to the salty and spicy pork, and it was AMAZING! I dare you to try!
These were so good, that I may just make pulled pork for flautas instead of sandwiches! Even my husband gave me kudos for turning leftovers into something so yummy and new! Hope you enjoy!
Friday, September 30, 2011
Apple Chips
As I mentioned here, I needed to use up the apples from our Back To School event. And I did not use them all in the apple pie, so I had to make one more thing with the three apples I had left! Being someone who loves to snack, I decided to make apple chips, and now that I know how easy they are, I may be doing this with more fruits and veggies in the future!
Ingredients:
Apples, thinly sliced
Sugar
Lemon Juice
Water
Toppings ( I used cinnamon and maple sugar)
Set oven to 200 degrees, and grease a large baking sheet. Next, slice your apples thinly. Don't worry if parts of your apple have gone bad... some of my favorite chips were 1/2 slices. If you are making this recipe for kids, I would recommend slicing them into bite sized pieces.

Next, put all your slices in a bowl, and gently toss with about 1 Tbsp of Lemon juice. I did not measure, just poured in enough to cover them. This helps them not turn brown while you are doing the next steps.

In a small saucepan, make a simple syrup with sugar and water. I think I used 1 cup white sugar and 2 cups of water. I would half that if doing it again. I had a lot leftover. Bring to a boil, stirring to dissolve the sugar as you go.
Next, dip each apple slice into the simple syrup and place on the baking sheet. The simple syrup gives the apples a bit of moisture without too much sugar. I think you could really opt out of this step if you are trying to limit your sugar intake.

Ingredients:
Apples, thinly sliced
Sugar
Lemon Juice
Water
Toppings ( I used cinnamon and maple sugar)
Set oven to 200 degrees, and grease a large baking sheet. Next, slice your apples thinly. Don't worry if parts of your apple have gone bad... some of my favorite chips were 1/2 slices. If you are making this recipe for kids, I would recommend slicing them into bite sized pieces.
Next, put all your slices in a bowl, and gently toss with about 1 Tbsp of Lemon juice. I did not measure, just poured in enough to cover them. This helps them not turn brown while you are doing the next steps.
In a small saucepan, make a simple syrup with sugar and water. I think I used 1 cup white sugar and 2 cups of water. I would half that if doing it again. I had a lot leftover. Bring to a boil, stirring to dissolve the sugar as you go.
Next, dip each apple slice into the simple syrup and place on the baking sheet. The simple syrup gives the apples a bit of moisture without too much sugar. I think you could really opt out of this step if you are trying to limit your sugar intake.
Here comes the fun part! Add whatever toppings you want to the apples. I chose Maple sugar from Savory Spice Shop and cinnamon (I usually use the cinnamon fro Savory too, but I ran out so I had to borrow this from a neighbor!). Other combinations could be ginger, brown sugar, nutmeg, coco powder, etc. Whatever your heart desires! Just sprinkle them on!
Bake at 200 degrees for 1 hour, and then open the oven slightly and bake for another hour to hour and a half. This allows the moisture to escape and the apples to dry out. Take a spatula and loosen them from the pan and eat! Delicious!
Thursday, September 29, 2011
Muriel's Apple Pie
I am not a pie maker, although I did make my grandmother Muriel's pecan pies last year that were amazing!!! My brother loves her apple pie, and since I had all these apples left over, I decided to make him one as a special treat.
Ingredients:
6-7 Apples (I used 6 and probably should have used 7)
1 cup Sugar
Cinnamon
Pre-made Pie Crusts (2)
2 Tbsp Butter
First, peel your apples and cut into slices.
Next, in a bowl, add 1/2 cup of sugar, a couple Tbsp of Cinnamon, and stir. Once you get the mixture stirred, add another 1/2 cup of sugar and mix well.
Next, open up your pre-made pie crusts and put into a greased pie plate.
Preheat your oven for 400 degrees. The pie will take 50 minutes.
Pour the apples into the pie crust.
And on top, take 2 Tbsp of butter and cut it into thin slices, and place on top before adding the top pie crust.
I decided to try a fancy, old fashioned way to place the top crust on. I rolled out the pie crust and cut it into strips, and then wove the strips on top. I think next time I will just place the whole crust on top, cutting in a few holes for ventilation.
Make sure to pinch the edges to stick the crusts together, and make it look pretty!
My grandmother does not cover the pie with foil, but I did cover just the edges with foil, as my crust was starting to get really brown. Bake at 400 degrees for 45 minutes, check the pie and remove the foil, and let bake for an additional 5 minutes to really brown the crust. Take out of the oven and let it cool down enough to where it has set and is warm but not hot. Serve with vanilla ice cream for the ultimate indulgence!
So simple and easy - I guess that's why they say "It's as easy as pie!" My grandmother would love for me to tell you that this is also how you make cherry pie. Just substitute 1 can of cherries for the apples. Hope you enjoy!
Ingredients:
6-7 Apples (I used 6 and probably should have used 7)
1 cup Sugar
Cinnamon
Pre-made Pie Crusts (2)
2 Tbsp Butter
First, peel your apples and cut into slices.
Next, in a bowl, add 1/2 cup of sugar, a couple Tbsp of Cinnamon, and stir. Once you get the mixture stirred, add another 1/2 cup of sugar and mix well.
Next, open up your pre-made pie crusts and put into a greased pie plate.
Preheat your oven for 400 degrees. The pie will take 50 minutes.
Pour the apples into the pie crust.
And on top, take 2 Tbsp of butter and cut it into thin slices, and place on top before adding the top pie crust.
I decided to try a fancy, old fashioned way to place the top crust on. I rolled out the pie crust and cut it into strips, and then wove the strips on top. I think next time I will just place the whole crust on top, cutting in a few holes for ventilation.
Make sure to pinch the edges to stick the crusts together, and make it look pretty!
My grandmother does not cover the pie with foil, but I did cover just the edges with foil, as my crust was starting to get really brown. Bake at 400 degrees for 45 minutes, check the pie and remove the foil, and let bake for an additional 5 minutes to really brown the crust. Take out of the oven and let it cool down enough to where it has set and is warm but not hot. Serve with vanilla ice cream for the ultimate indulgence!
So simple and easy - I guess that's why they say "It's as easy as pie!" My grandmother would love for me to tell you that this is also how you make cherry pie. Just substitute 1 can of cherries for the apples. Hope you enjoy!
Wednesday, September 28, 2011
Vintage Finds 9.28.2011
This past weekend, on our usual garage sale outing, I came across this beverage jar at a church sale. Since I broke the lid to the one I have (and now it looks a little ghetto), I have been looking for a new one. I originally liked this one with the stand, but I couldn't stomach the price. Well, when I saw this one, I thought it was expensive (anything over $5 at a garage sale is expensive to me) and it is really large. Where would I put it? Luckily, I came to my senses after a few minutes, after remembering how much the other one was, and thought $10 was actually a deal. Plus, when I went back to look at it, I really noticed how beautiful it is with its thick green glass, that it has little handles on the side, and was made in Italy (or so it says on the bottom). And it had a lid. The only gamble was that I didn't know if the spigot worked, and had to test when I got home - which it does!!!
And here is what I love most about it- on the back side, it has levels for how many gallons it holds, and would you believe this beauty hold 5 gallons!!! That is a LOT of punch, and I am looking forward to breaking it out at our next party!
Have you found any good vintage finds lately?
And here is what I love most about it- on the back side, it has levels for how many gallons it holds, and would you believe this beauty hold 5 gallons!!! That is a LOT of punch, and I am looking forward to breaking it out at our next party!
Have you found any good vintage finds lately?
Subscribe to:
Posts (Atom)